
Common Wiring Problems Behind Thermostat Failures
Common Wiring Problems Behind Thermostat Failures
Is your heating or cooling system acting up? Before you panic about expensive repairs, the culprit might be something simpler than you think. Thermostat wiring problems account for nearly 80% of thermostat failures, and many of these issues are easier to fix than you'd expect.
Your thermostat acts as the brain of your HVAC system, sending signals through low-voltage wires to control when your furnace, air conditioner, or heat pump turns on and off. When those wires develop problems, your entire system can stop working properly—leaving you sweltering in summer or freezing in winter.
In this guide, we'll walk you through the most common wiring problems that cause thermostat failures, how to spot them, and what you can do about them.
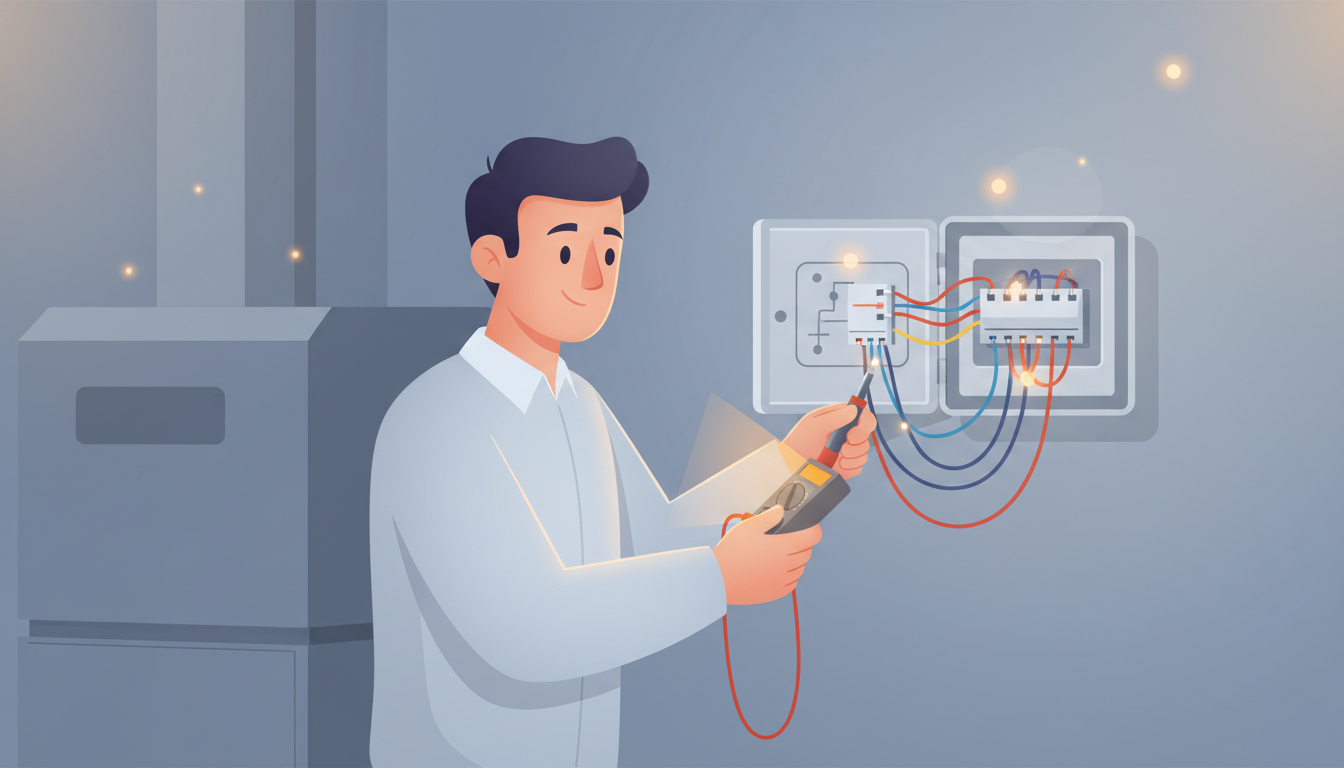
Understanding Thermostat Wiring Basics
Before diving into problems, let's cover the basics. Most residential thermostats use low-voltage wiring (typically 24 volts) to communicate with your HVAC system. This is much safer than the high-voltage electricity running through your home's outlets.
What Do Thermostat Wire Colors Mean?
Each wire color serves a specific purpose:
- R wire (Red): Power from your HVAC system (24V)
- C wire (Blue/Black): Common wire that completes the circuit
- W wire (White): Controls your heating system
- Y wire (Yellow): Controls your air conditioning compressor
- G wire (Green): Controls your fan
- Rc and Rh wires: Separate power for cooling and heating in some systems
Understanding these color codes helps you identify whether wires are connected to the correct terminals on your thermostat base plate.
1. Loose Wire Connections
Loose wire connections are the #1 cause of thermostat wiring problems. Over time, the small screws that hold wires in place on the thermostat terminals can work themselves loose due to temperature changes, vibration from your HVAC system, or simply aging.
Symptoms of Loose Connections
- Your heating or cooling system turns on and off randomly
- The system doesn't respond when you adjust the temperature
- Intermittent operation that works sometimes but not others
- Your thermostat keeps rebooting unexpectedly
How to Fix Loose Connections
Turn off power to your HVAC system at the circuit breaker. Remove your thermostat cover and check each wire connection at the terminal screws. Gently tug on each wire—if it comes loose, you've found your problem. Tighten the terminal screws firmly (but don't overtighten, which can strip the screw or break the wire).
Also check connections at your furnace or air handler control board, as loose connections can occur there too.
2. Corroded or Oxidized Wires
Wire corrosion happens when moisture gets into your thermostat or HVAC system. The copper conductors oxidize over time, creating a green or white crusty buildup that blocks electrical signals.
What Causes Wire Corrosion?
- High humidity in your home or basement
- Water leaks near your HVAC equipment
- Condensation from temperature fluctuations
- Age (wiring over 15-20 years old is more susceptible)
Signs Your Wires Are Corroded
- Visible green, white, or blue buildup on exposed wire ends
- Wires that look discolored or darkened
- Your HVAC system doesn't respond consistently
- Thermostat not working even after replacing batteries
The Solution
For minor corrosion, you can clean wire ends with fine-grit sandpaper or a wire brush. Strip back corroded sections to expose fresh copper, then reconnect. However, if corrosion is extensive, you'll need to replace the affected wiring entirely.
3. Damaged or Frayed Wire Insulation
The plastic coating around thermostat wires protects the conductors from touching each other or metal surfaces. When this insulation becomes brittle, cracks, or gets stripped away, you're looking at potential short circuits.
Common Causes of Insulation Damage
- Years of heat and cold cycles
- Rodents or pests chewing through wires
- Physical damage during home renovations
- Poor installation where wires rub against sharp edges
How to Identify Damaged Insulation
Look for wires with visible cracks, exposed copper, or areas where the plastic coating has completely worn away. If you see bare wire touching another wire or metal surface, that's a short circuit waiting to happen.
Repair or Replace?
Small areas of damage can be wrapped with electrical tape as a temporary fix. For extensive damage or multiple compromised sections, replace the thermostat wire completely. It's inexpensive and provides long-term reliability.
4. Incorrect Wiring During Installation
DIY thermostat installation seems straightforward, but one wire in the wrong terminal can cause major problems. This is especially common when upgrading to a smart thermostat without understanding the HVAC repair guide basics.
Common Wiring Mistakes
- Reversed R and C wires: Causes the thermostat to not power on
- Y wire on W terminal: Your AC runs when you call for heat
- Missing C wire: Smart thermostats need this for constant power
- Doubled-up wires: Multiple wires jammed under one terminal
- Wrong gauge wire: Using wire that's too thin for the application
Smart Thermostat Wiring Issues
Modern smart thermostats like Nest, Ecobee, and Honeywell Wi-Fi models require a C wire (common wire) for continuous power. Older homes often lack this wire, causing the thermostat to drain batteries quickly or malfunction.
If your old thermostat worked fine without a C wire but your new smart thermostat doesn't, you'll need to either:
- Run a new C wire from your furnace to the thermostat
- Install a C wire adapter at your furnace
- Use a power adapter kit (some smart thermostats include these)
Double-Check Before Powering On
Take a photo of your old thermostat wiring before disconnecting anything. Match each wire to the same letter terminal on your new thermostat. When in doubt, consult your thermostat's wiring diagram or call a professional.
5. Short Circuits from Touching Wires
When two thermostat wires touch each other, they create a short circuit that sends incorrect signals to your HVAC system. This can happen if:
- Wire insulation is stripped back too far during installation
- Too many wires are crammed into a small space
- Wires shift position over time and make contact
Symptoms of Wire Short Circuits
- Your furnace or AC runs continuously without stopping
- The system won't turn on at all
- Circuit breaker trips repeatedly
- Burning smell coming from your thermostat
How to Prevent Wire Shorts
When installing a thermostat, strip only about 1/4 inch of insulation from each wire end. Make sure bare copper doesn't touch adjacent wires. Use wire nuts or electrical tape to separate and organize wires behind the thermostat.
6. Inadequate Wire Gauge
Most thermostats require 18-gauge thermostat wire. Using wire that's too thin (higher gauge numbers) creates resistance that weakens electrical signals traveling between your thermostat and HVAC equipment.
When Wire Gauge Becomes a Problem
- Long wire runs (over 50 feet) between thermostat and furnace
- Multiple zones in a large home
- High-power accessories like humidifiers or dampers
If your thermostat is far from your HVAC equipment and you're experiencing intermittent operation, undersized wiring might be the culprit.
7. Broken or Severed Wires
Wires can break inside walls during remodeling projects, from pest damage, or simply from age. A broken wire completely cuts off communication between your thermostat and HVAC system.
How to Detect Broken Wires
- Thermostat has power but HVAC doesn't respond
- Only some functions work (heat works but AC doesn't)
- Testing with a multimeter shows no continuity on certain wires
Fishing New Wires
If you have a broken wire inside a wall, you may need to fish new wire through the same path. This can be challenging in finished homes. Some technicians use the old wire to pull new wire through the same holes.
8. Missing or Improperly Connected C Wire
The C wire (common wire) completes the 24-volt circuit and provides constant power to smart thermostats. Many older homes were wired without a C wire because traditional thermostats didn't need continuous power.
Why the C Wire Matters Now
Battery-powered thermostats worked fine without a C wire. But today's smart thermostats need constant power to maintain Wi-Fi connections, touchscreens, and advanced features. Without a proper C wire:
- Batteries drain quickly
- Thermostat randomly shuts off
- Wi-Fi connection drops
- Screen goes blank
C Wire Solutions
Check if you have an unused wire in your thermostat cable. Many installers run 5-wire or 7-wire cable but only connect 4 wires, leaving extra conductors available. You can repurpose one of these as your C wire.
If no spare wire exists, install a C wire adapter (like the Venstar Add-A-Wire) at your furnace. These devices let you use your existing 4-wire setup to carry 5 functions.
9. Voltage Problems at the Transformer
Your HVAC system uses a transformer to step down household 120V power to the 24V your thermostat needs. If this transformer fails or provides inconsistent voltage, your thermostat wiring won't function properly.
Signs of Transformer Issues
- Thermostat screen is dim or flickering
- Voltage reads below 22V or above 26V when tested with a multimeter
- System works sometimes but not consistently
Test voltage at the R and C terminals with a multimeter. You should see between 22-26 volts AC. Readings outside this range indicate a transformer problem.
10. Circuit Breaker and Fuse Problems
Before assuming your thermostat wiring is bad, always check your circuit breaker panel. A tripped breaker cuts power to your HVAC system entirely, mimicking a wiring problem.
Quick Troubleshooting Steps
- Check your main HVAC breaker in your electrical panel
- Look for the safety switch near your furnace or air handler
- Check for blown fuses in your furnace control panel
If a breaker trips repeatedly after you reset it, you have a more serious electrical problem that requires professional diagnosis.
When to Call a Professional vs. DIY
Some wiring problems are safe for homeowners to fix, while others require a licensed HVAC technician.
Safe DIY Fixes
- Tightening loose wire connections
- Cleaning minor wire corrosion
- Replacing a thermostat with matching wiring
- Checking circuit breakers and fuses
When to Call a Pro
- Running new wires through walls
- Working inside your furnace or control board
- Dealing with repeated short circuits
- If you smell burning or see smoke
- Installing a C wire adapter at your furnace
- Any time you're uncomfortable working with electrical systems
Safety always comes first. While thermostat wiring is low-voltage and relatively safe, mistakes can damage expensive HVAC equipment or create fire hazards.
How Much Does Thermostat Wiring Repair Cost?
Understanding costs helps you budget for repairs:
- Tightening loose connections: $75-$150 service call
- Replacing damaged thermostat wire: $150-$300
- Running new wire through walls: $200-$500
- Installing C wire adapter: $150-$250
- Complete rewiring: $300-$600
Many HVAC companies charge a diagnostic fee ($75-$125) that goes toward the repair if you hire them.
Preventing Future Thermostat Wiring Problems
Regular Maintenance
- Schedule annual HVAC maintenance that includes thermostat inspection
- Check wire connections every few years
- Keep your HVAC area dry and well-ventilated
- Address water leaks immediately
Quality Installation Matters
When installing a new thermostat:
- Use proper gauge wire for your run length
- Strip minimal insulation (1/4 inch maximum)
- Tighten terminal screws properly
- Label wires before disconnecting old thermostats
- Take photos of existing wiring
Protect Wires from Damage
- Run wires through conduit in unfinished areas
- Keep wires away from sharp edges
- Address pest problems promptly
- Avoid pinching wires behind thermostat bases
FAQ: Thermostat Wiring Problems
How do I know if my thermostat wiring is bad?
Common signs include your HVAC system not responding to temperature changes, intermittent operation, the thermostat screen going blank randomly, or your system short cycling. Visual inspection may reveal corroded, loose, or damaged wires at the thermostat or furnace terminals.
Can I replace thermostat wiring myself?
Yes, if you're comfortable with basic electrical work and the wire run is accessible. Always turn off power at the circuit breaker first. For wires hidden in walls or complex installations, hiring a professional ensures the job is done safely and correctly.
What causes thermostat wiring to corrode?
Moisture is the primary cause of wire corrosion. High humidity, water leaks near HVAC equipment, condensation from temperature fluctuations, and age all contribute to oxidation of the copper conductors. Homes in humid climates or with basement HVAC installations see more corrosion issues.
Do all smart thermostats need a C wire?
Most modern smart thermostats require a C wire for continuous power. Some models can work without one using battery power or "power stealing" technology, but this often leads to performance issues. Check your specific thermostat's requirements before installation.
How long does thermostat wiring last?
Quality thermostat wiring in a dry, protected environment can last 20-30 years or more. However, wiring exposed to moisture, temperature extremes, or physical stress may need replacement in 10-15 years. Regular inspection helps catch problems early.
Take Control of Your Home Comfort
Thermostat wiring problems might seem intimidating, but understanding what to look for puts you in control. Many issues—like loose connections or minor corrosion—are simple fixes that save you money and restore comfort quickly.
Start with the basics: check for loose connections, inspect for visible damage, and verify your circuit breakers. If you discover more complex problems or feel uncomfortable with electrical work, don't hesitate to call a qualified HVAC technician.
Remember, your thermostat is the control center of your heating and cooling system. Keeping its wiring in good condition ensures reliable comfort year-round and helps your HVAC system run efficiently, potentially saving you hundreds on energy bills.
Ready to tackle more HVAC issues? Explore our complete HVAC repair guide for troubleshooting tips and maintenance advice.