How to Clean HVAC Ducts at Home: A Complete DIY Guide
Is your HVAC system blowing dusty air throughout your home? Are your energy bills creeping up despite normal usage? Dirty air ducts might be the culprit. The good news is that you can clean your HVAC ducts yourself with the right tools and techniques, saving hundreds of dollars on professional services while improving your home's air quality.
In this comprehensive guide, you'll learn exactly how to clean HVAC ducts at home, what tools you need, when to tackle the job yourself, and when to call in the professionals.
Why Clean Your HVAC Ducts?
Your HVAC ductwork is the respiratory system of your home. Over time, dust, pet dander, pollen, and other contaminants accumulate inside these passages. Every time your heating or cooling system runs, it pushes these particles into the air you breathe.
Regular duct cleaning offers several important benefits:
- Improved indoor air quality: Removing built-up dust and allergens means cleaner air for your family
- Better HVAC efficiency: Clean ducts allow air to flow freely, reducing strain on your system
- Lower energy bills: When your system works more efficiently, it uses less energy
- Extended system lifespan: Less dust means less wear on HVAC components
- Reduced allergen exposure: Particularly important for family members with asthma or allergies
Studies show that HVAC systems can accumulate up to 40 pounds of dust annually. That's a lot of particles circulating through your living space.
Signs Your Air Ducts Need Cleaning
Before you start the cleaning process, make sure your ducts actually need attention. Watch for these warning signs:
Visible Dust and Debris
If you remove a vent cover and see visible dust clumps, hair, or debris inside, it's time to clean. Shine a flashlight into the ductwork—if you see buildup on the walls, your ducts need attention.
Increased Dust Around Your Home
Are you dusting furniture more frequently? Do surfaces accumulate dust quickly after cleaning? Your ductwork might be recirculating dust throughout your home.
Musty or Stale Odors
Strange smells coming from your vents can indicate mold growth, pest presence, or accumulated debris. Musty odors are particularly concerning as they often signal moisture problems.
Reduced Airflow
Weak airflow from your vents suggests blockages in your ductwork. While filters are often the culprit, dirty ducts can also restrict air movement.
Allergy Symptoms Worsen Indoors
If family members experience more sneezing, coughing, or congestion at home compared to outdoors, poor indoor air quality from dirty ducts could be the cause.
Visible Mold Growth
Any visible mold around vents or inside ductwork requires immediate attention. This situation typically demands professional remediation.
Tools and Materials You'll Need
Gathering the right equipment before you start makes the cleaning process much smoother. Here's what you'll need for DIY duct cleaning:
Essential Cleaning Tools
- Shop vacuum or wet/dry vacuum: A standard household vacuum won't cut it. You need a high-powered shop vac with strong suction
- Vacuum with long hose attachment: The longer the hose, the deeper you can reach into ductwork
- Duct cleaning brush or dryer vent brush: Stiff-bristled brushes designed to scrub duct walls. Look for brushes with extendable handles
- Screwdriver or power drill: For removing vent covers and registers
- Microfiber cloths: Perfect for wiping down vent covers and accessible duct surfaces
- Large household brush: For loosening stubborn dust and debris
Safety Equipment
- Dust mask or N95 respirator: Protect your lungs from dust and allergens
- Safety goggles: Keep dust out of your eyes
- Work gloves: Protect your hands from sharp metal edges and dirty surfaces
Optional but Helpful
- Paper towels: For cleaning vent covers
- Mild dish soap and warm water: For washing vent covers
- Bucket or basin: For soaking dirty vent covers
- Flashlight or headlamp: To see inside dark ductwork
- Camera or smartphone: Document conditions before and after cleaning
Replacement Parts
- New HVAC filter: Always replace your air filter after cleaning ducts
- Furnace filter (if applicable): Check your system's requirements
Most homeowners already have many of these items. The specialized tools like duct brushes typically cost $20-40 and are reusable for future cleanings.
How to Clean HVAC Ducts at Home: Step-by-Step Process
Follow this systematic approach to clean your air ducts thoroughly and safely.
Step 1: Turn Off Your HVAC System
Safety first. Locate your thermostat and switch your HVAC system completely off. Don't just adjust the temperature—turn the system to the "Off" position.
For extra safety, turn off power to your furnace or air handler at the circuit breaker. This prevents the system from accidentally turning on while you're working.
Step 2: Remove and Inspect Vent Covers
Using your screwdriver or drill, remove all supply and return vent covers throughout your home. Supply vents blow air into rooms, while return vents pull air back into the system.
As you remove each cover, inspect it for damage and note its location. Taking photos helps you remember which cover goes where, especially if they're different sizes.
Place the covers in a bathtub or large basin filled with warm, soapy water. Let them soak while you clean the ductwork. This loosens accumulated dust and grime.
Step 3: Cover Supply Vents (Optional)
This step is optional but effective. Cover the supply vents with paper towels or thin cloths. This creates back pressure that helps push loosened dust toward the return vents where you'll be vacuuming.
Leave the supply vents in living areas uncovered so you can clean them.
Step 4: Set Up Your Fan (Optional)
If you want maximum dust removal, you can briefly turn the fan to "On" mode (not heating or cooling) to help move loosened dust toward the return vents. Only do this after you've covered most supply vents.
Most DIY cleaners skip this step to avoid spreading dust during the initial cleaning phase.
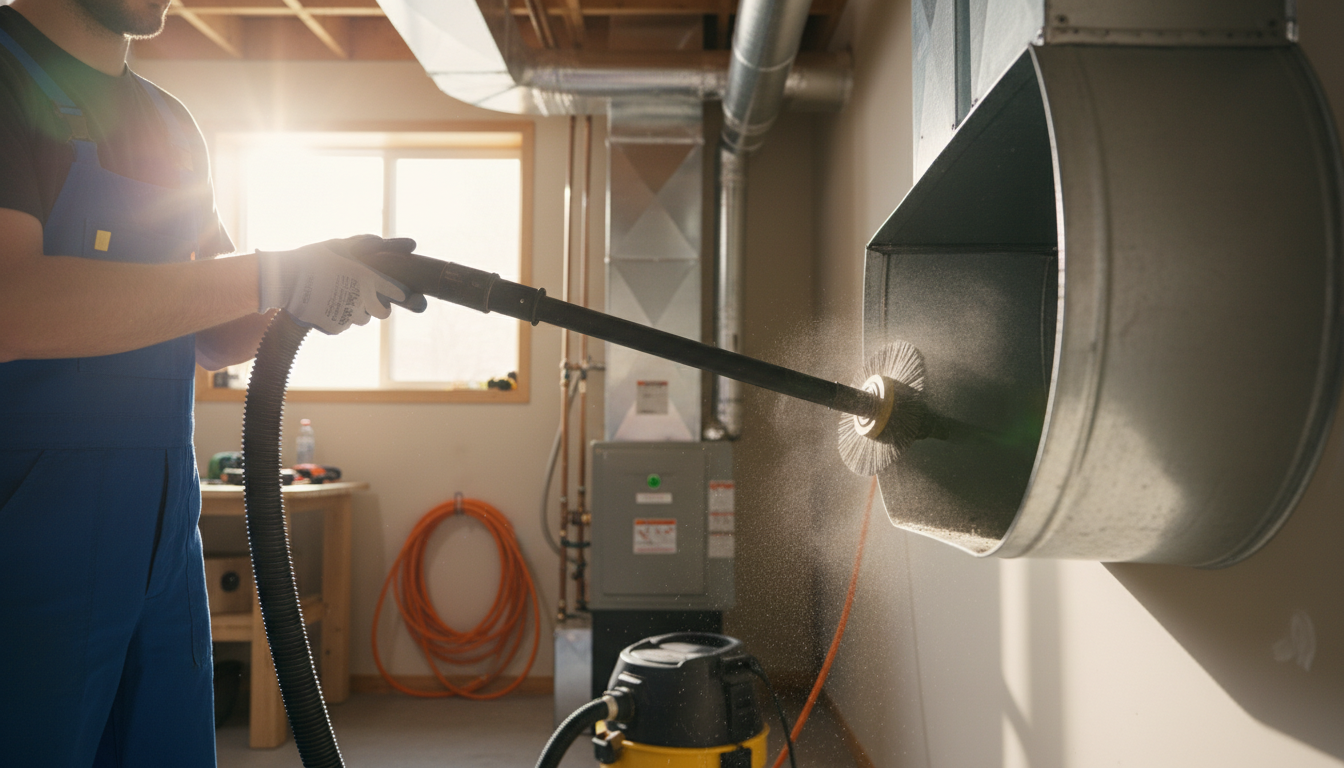
Step 5: Loosen Dust and Debris in the Ducts
This is where the real cleaning begins. Insert your duct brush into each supply and return vent opening. Using gentle but firm pressure, scrub the walls of the ductwork.
Work systematically:
- Scrub in circular motions around the duct walls
- Extend your brush as far as it will reach
- Pay special attention to bends and joints where dust accumulates
- Knock loose any visible clumps or debris
You'll see dust clouds forming—this is why wearing your mask and goggles is crucial. For ducts you can't reach with a brush, tap on the outside of accessible ductwork (usually in basements or crawlspaces) to dislodge dust. Be gentle—you don't want to damage the ducts.
Step 6: Vacuum the Loosened Dust
Immediately after loosening dust in each vent, use your shop vacuum to remove it. Insert the vacuum hose as far as possible into each duct opening.
Technique matters:
- Use a back-and-forth motion with the vacuum hose
- Work slowly to allow maximum suction
- Vacuum along the bottom of horizontal ducts where debris settles
- Pay attention to the first 3-5 feet of ductwork—this is where most accessible buildup occurs
For return vents (typically larger and located near the floor or on walls), spend extra time vacuuming since these collect the most debris.
Step 7: Clean the Blower Compartment and Return Air Boot
If you're comfortable accessing your furnace or air handler, clean the blower compartment. This is where the blower fan is located.
Turn off power at the circuit breaker first. Remove the access panel and use your vacuum to clean around the blower fan. Be careful not to bump or damage any components.
Also vacuum the return air boot—the large duct connection where air enters your furnace. This area often accumulates significant dust.
If you're not comfortable with this step, skip it and focus on the accessible vents.
Step 8: Wipe Down Duct Openings and Grilles
With most loose dust removed, use damp microfiber cloths to wipe down the visible portions of each duct opening. This removes fine dust particles your vacuum might have missed.
Clean around the edges where vents attach to walls or ceilings. These areas often have stubborn dust buildup.
Step 9: Clean and Dry Vent Covers
Remove the vent covers from their soapy bath. Scrub both sides with a brush, paying attention to the slats and corners where grime accumulates.
Rinse thoroughly with clean water and dry completely. Never reinstall wet vent covers—moisture promotes mold growth.
Step 10: Replace Your HVAC Filter
This step is crucial. Your old filter is full of the dust you just cleaned. Installing a fresh, high-quality filter prevents newly cleaned ducts from getting dirty again quickly.
Check your HVAC system's manual for the correct filter size and type. Consider upgrading to a higher MERV rating (8-11 for residential systems) for better filtration.
Step 11: Reinstall Vent Covers
Once everything is clean and dry, reinstall all vent covers. Make sure they're secured properly—loose covers can rattle when your system runs.
Step 12: Final System Check
Turn your HVAC system back on at the thermostat and circuit breaker. Listen for unusual noises and check that air flows properly from all vents.
Monitor your system for the next few days to ensure everything operates normally.
Understanding Different Types of Ductwork
Not all ductwork is the same. Knowing your duct type helps you clean more effectively.
Flexible Ducts
These ducts have a wire coil covered with flexible plastic. They're common in newer homes and attics. Be extremely gentle when cleaning flexible ducts—aggressive brushing can tear the material.
Sheet Metal Ducts
Rigid metal ducts (galvanized steel or aluminum) are durable and can handle more aggressive cleaning. These are the easiest to clean thoroughly.
Fiberglass Duct Board
These ducts have a fiberglass lining that can be damaged by rough brushing. If you have fiberglass duct board, gentle vacuuming is your best approach. Avoid using brushes that might tear the lining.
If you're unsure what type of ductwork you have, inspect an accessible section in your basement or attic, or consult your home's building documents.
How Often Should You Clean Your HVAC Ducts?
Cleaning frequency depends on several factors unique to your home.
Standard Recommendation
For most homes, professional duct cleaning every 3-5 years is sufficient, with DIY maintenance cleaning twice annually (spring and fall).
Clean More Frequently If You Have:
- Pets: Pet hair and dander accumulate quickly in ducts. Annual cleaning is recommended.
- Allergies or asthma: More frequent cleaning (every 1-2 years) helps minimize triggers.
- Smokers in the home: Tobacco smoke residue builds up in ductwork.
- Recent renovation: Construction dust can fill your duct system.
- High dust area: Homes near construction sites or unpaved roads need more frequent cleaning.
Seasonal Timing
Spring and fall are ideal times for DIY duct maintenance. Clean in spring before running your air conditioning and in fall before firing up your heating system. This ensures your HVAC system starts each season with clean ducts.
DIY vs. Professional Duct Cleaning: When to Call the Pros
While DIY cleaning handles routine maintenance effectively, some situations require professional equipment and expertise.
When DIY Cleaning Is Appropriate
- Regular maintenance between professional cleanings
- Surface dust and debris removal
- Recently cleaned ducts that need touch-ups
- Preventive maintenance for generally clean systems
When to Call Professional Duct Cleaners
Hire professionals if you encounter:
Mold Growth: Visible mold inside ductwork or around vents requires professional remediation. Improper mold removal can spread spores throughout your home.
Pest Infestation: Rodent droppings, nests, or dead pests in ducts need professional removal and sanitization.
Severe Blockages: If you can't dislodge debris or suspect major blockages deep in your ductwork.
Post-Construction Dust: Major renovations fill ductwork with fine construction dust that requires professional equipment to remove completely.
Water Damage: If your ducts have experienced water intrusion, professionals have the tools to properly dry and treat them.
Accessible Ductwork Issues: Ducts in walls, ceilings, or other inaccessible locations need professional attention.
Persistent Odors: If cleaning doesn't eliminate musty or strange smells, professionals can identify and treat the source.
Professional Cleaning Cost
Professional duct cleaning typically costs $300-1,000 depending on your home's size, ductwork complexity, and regional pricing. This includes equipment that reaches much deeper into your system than DIY methods allow.
The National Air Duct Cleaners Association (NADCA) recommends using certified professionals who follow industry standards. For major cleaning needs, professional service is worth the investment for thorough results.
Common DIY Duct Cleaning Mistakes to Avoid
Even well-intentioned homeowners can damage their HVAC systems with improper cleaning techniques. Avoid these common errors:
Using Household Cleaners or Chemicals
Never spray cleaners, bleach, or chemicals into your ductwork. These substances can release harmful fumes when your system runs and may damage duct materials. Stick to mechanical cleaning methods (brushing and vacuuming).
Aggressive Brushing of Flexible Ducts
Flexible ductwork tears easily. Use gentle pressure and avoid repeatedly scrubbing the same spot.
Forgetting to Change the Filter
Cleaning ducts but keeping a dirty filter defeats the purpose. Always install a fresh filter after cleaning.
Cleaning with the System Running
Never clean ducts with your HVAC system actively heating or cooling. Besides the safety risk, running the system while cleaning just recirculates dust.
Ignoring Professional-Only Situations
Attempting to clean severe mold or pest problems yourself can worsen the issue and expose you to health hazards.
Not Sealing Duct Leaks
If you notice air leaking from duct joints or holes during cleaning, seal them with metal foil tape (not standard duct tape, which degrades). Leaky ducts waste energy and reduce system efficiency.
Rushing the Process
Thorough duct cleaning takes several hours. Rushing through steps means you'll miss dust and debris, reducing the effectiveness of your work.
Maintaining Clean Ducts Between Cleanings
Keep your ductwork cleaner longer with these maintenance strategies:
Change Filters Regularly: Replace your HVAC filter every 1-3 months depending on your home's conditions. This is the single most important maintenance task.
Vacuum Vent Covers Monthly: Quick surface cleaning prevents buildup.
Control Dust Sources: Use doormats, remove shoes indoors, and dust regularly to minimize what enters your ductwork.
Maintain Proper Humidity: Keep indoor humidity between 30-50% to prevent mold growth in ducts.
Schedule Professional Inspections: Have an HVAC technician inspect your system annually. They can spot duct issues early.
Upgrade Your Filter: Higher MERV-rated filters (8-11) trap more particles before they enter your ductwork.
Seal and Insulate Ducts: Properly sealed ducts prevent dust from entering through gaps and improve efficiency.
The Health Benefits of Clean Air Ducts
Clean ductwork directly impacts your family's health. Here's what research shows:
The EPA notes that indoor air can be 2-5 times more polluted than outdoor air. Your HVAC system circulates air throughout your home 5-7 times daily. When ducts are dirty, they continuously reintroduce pollutants into your living space.
For Allergy and Asthma Sufferers: Clean ducts reduce exposure to common triggers like dust mites, pollen, and pet dander. Many homeowners report fewer symptoms after thorough duct cleaning.
For Everyone: Removing accumulated dust, bacteria, and particles creates a healthier indoor environment. You may notice less congestion, fewer headaches, and better overall well-being.
Clean ducts are especially important for young children, elderly family members, and anyone with respiratory sensitivities.
Frequently Asked Questions
Can I use a regular vacuum to clean my air ducts?
Standard household vacuums lack the power needed for effective duct cleaning. Shop vacuums or wet/dry vacuums provide the strong suction necessary to remove accumulated dust and debris. A standard vacuum may also clog quickly or overheat when used for heavy-duty duct cleaning.
How long does DIY duct cleaning take?
Plan for 2-4 hours depending on your home's size and how many vents you have. A thorough job shouldn't be rushed. Larger homes with multiple HVAC systems may take longer.
Will cleaning my ducts reduce my energy bills?
Clean ducts can improve HVAC efficiency by allowing better airflow, which may reduce energy consumption by 10-15%. However, the primary benefits are improved air quality and reduced system wear. Don't expect dramatic bill reductions from duct cleaning alone.
Is professional duct cleaning worth the cost?
Professional cleaning is worth it when dealing with severe contamination, mold, pests, or when your ducts haven't been cleaned in many years. For routine maintenance, DIY cleaning between professional services provides good value. Consider professional cleaning every 3-5 years with DIY maintenance in between.
Can dirty ducts make you sick?
Yes, contaminated ductwork can contribute to respiratory issues, especially for people with allergies or asthma. Mold spores, bacteria, and accumulated allergens circulating through dirty ducts can trigger symptoms or worsen existing conditions. However, ducts are just one factor in indoor air quality—proper ventilation, humidity control, and general cleanliness also matter.
Take Control of Your Home's Air Quality
Learning how to clean HVAC ducts at home empowers you to maintain better indoor air quality while saving money between professional cleanings. While DIY duct cleaning can't match the depth of professional service with specialized equipment, regular maintenance makes a noticeable difference in your home's air quality and HVAC efficiency.
Remember the key points: gather the right tools, follow the step-by-step process systematically, know when to call professionals, and maintain your system with regular filter changes. Your family will breathe easier, and your HVAC system will thank you with improved performance.
Ready to get started? Gather your supplies, set aside a few hours this weekend, and give your home's air ducts the cleaning they deserve. For professional HVAC maintenance services and expert advice, visit Quick HVAC Fix for helpful resources and solutions to all your heating and cooling needs.