
What a Refrigerant Leak Repair Usually Involves: Complete Guide
What a Refrigerant Leak Repair Usually Involves: Complete Guide
Is your air conditioner blowing warm air or running constantly without cooling your home? You might have a refrigerant leak. Understanding what a refrigerant leak repair usually involves can help you know what to expect when you call an HVAC technician and make informed decisions about your cooling system.
What Is Refrigerant and Why Are Leaks a Problem?
Refrigerant is the lifeblood of your air conditioning system. This chemical compound circulates through your AC unit, absorbing heat from inside your home and releasing it outside. When your system develops a leak, it slowly loses refrigerant, causing your AC to work harder while cooling less effectively.
Unlike engine oil or other fluids, refrigerant doesn't get "used up" during normal operation. If your system is low on refrigerant, it means you have a leak somewhere in the system. Simply adding more refrigerant without fixing the leak is like filling a tire with a hole in it—it's a temporary fix at best.
Refrigerant leaks can damage your compressor, increase your energy bills, and pose environmental concerns. That's why proper refrigerant leak repair is essential for your system's health and your comfort.
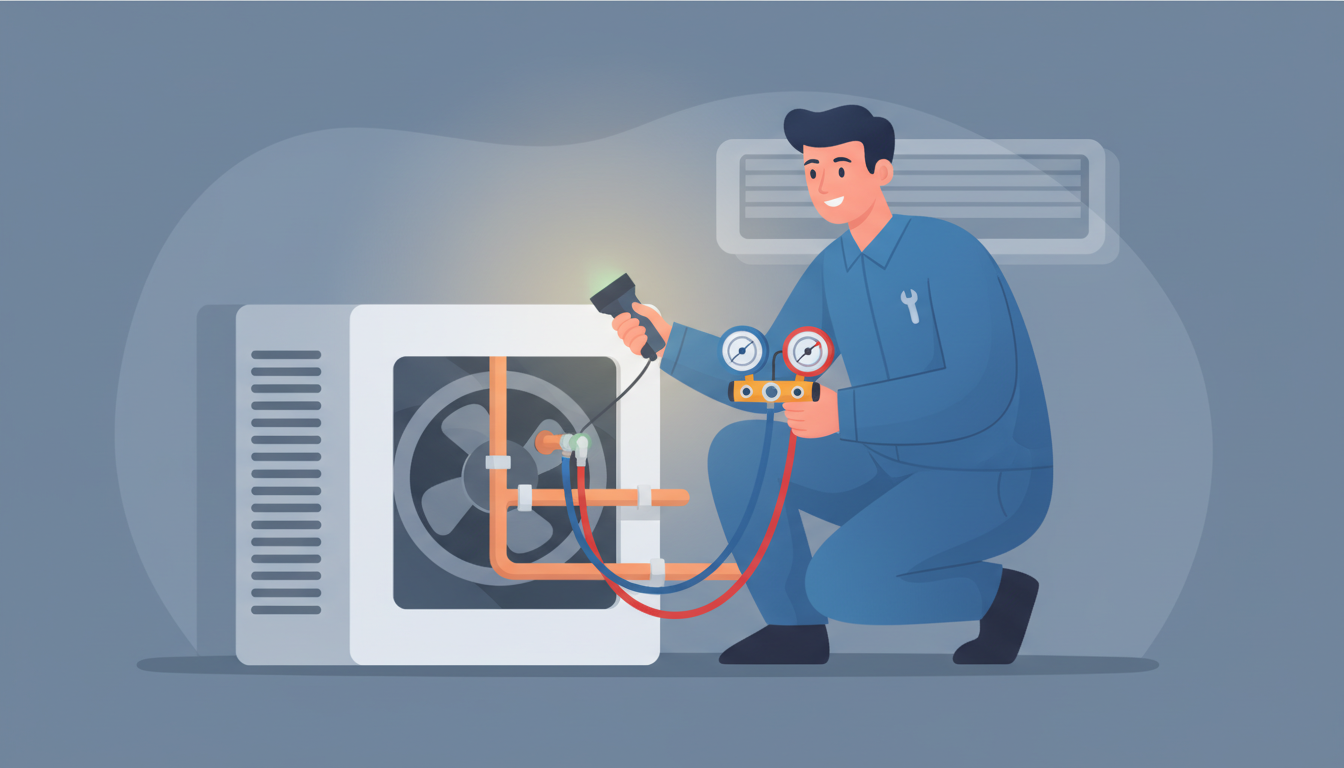
How HVAC Technicians Detect Refrigerant Leaks
The first step in any refrigerant leak repair is finding the exact location of the leak. Professional HVAC technicians use several proven detection methods:
Visual Inspection
Your technician will start by examining all visible refrigerant lines, connections, and coils. They'll look for:
- Oil stains or residue around connections (refrigerant and oil travel together)
- Corrosion or rust on copper lines
- Physical damage to refrigerant lines
- Worn or damaged valve cores at service ports
Electronic Leak Detectors
Electronic leak detectors are sensitive instruments that can identify refrigerant molecules in the air. These handheld devices emit an audible alarm when they sense refrigerant, helping technicians pinpoint even small leaks that aren't visible to the naked eye.
UV Dye Test
For difficult-to-find leaks, technicians inject a special UV dye into your refrigerant system. After the system runs for a while, they use a UV light to scan all components. The dye will glow brightly at the leak location, making even tiny leaks visible.
Nitrogen Pressure Test
For stubborn leaks or to verify a repair, technicians may perform a nitrogen pressure test. They'll evacuate the refrigerant, pressurize the system with nitrogen (an inert gas), and monitor the pressure over time. Any pressure drop indicates a leak that needs attention.
Soap Bubble Method
This old-school technique is still effective for accessible areas. Technicians spray soapy water on suspected leak points and watch for bubbles forming, which indicate escaping refrigerant.
Common Locations Where Refrigerant Leaks Occur
Refrigerant leaks don't happen randomly—they typically develop in specific vulnerable areas of your HVAC system.
Evaporator Coil Leaks
Your evaporator coil, located in the indoor air handler, is one of the most common leak locations. These coils can develop leaks due to:
- Corrosion from condensation and humidity
- Formaldehyde emissions from building materials (formic acid corrosion)
- Age and metal fatigue
- Poor maintenance leading to dirty coils
Evaporator coil leaks often require complete coil replacement, as these components are difficult to access and repair effectively.
Condenser Coil Leaks
The outdoor condenser coil faces harsh environmental conditions—rain, hail, lawn chemicals, and debris. Common causes of condenser coil leaks include:
- Physical damage from weed whackers or lawn equipment
- Corrosion from chemicals or salt air
- Vibration from the compressor
- Manufacturing defects
Refrigerant Line Connections
The copper refrigerant lines that connect your indoor and outdoor units have multiple connection points where leaks commonly develop:
- Brazed joints that weren't properly sealed during installation
- Flare fittings that have loosened over time
- Service port valves (Schrader valves) with damaged cores
Service Valves and Access Ports
The Schrader valves where technicians connect gauges to check refrigerant pressure are another common leak source. These valves can fail due to:
- Worn valve cores
- Damaged threads from improper gauge connections
- Missing or loose valve caps allowing dirt and moisture inside
The Step-by-Step Refrigerant Leak Repair Process
Once your HVAC technician locates the leak, here's what the refrigerant leak repair process typically involves:
Step 1: System Diagnosis and Leak Location
Your technician will perform a complete system evaluation, checking refrigerant pressure, identifying the leak location using the detection methods described above, and assessing whether repair or replacement makes more sense.
This diagnostic phase usually takes 30 minutes to 2 hours depending on how difficult the leak is to locate.
Step 2: Refrigerant Recovery
Before making any repairs, your technician must recover the remaining refrigerant from your system. This is required by EPA Section 608 regulations—venting refrigerant into the atmosphere is illegal and harmful to the environment.
The technician uses a recovery machine to safely capture the refrigerant for proper recycling or disposal. This process takes 15-30 minutes depending on how much refrigerant remains in the system.
Step 3: Performing the Repair
The actual repair method depends on the leak location and severity:
For Small Line Leaks: If the leak is at an accessible connection point, the technician may be able to repair it by re-brazing the joint. This involves:
- Cleaning the area thoroughly
- Using a torch to heat and apply new brazing material
- Creating a permanent, leak-free seal
For Component Leaks: When the leak is in a coil or other major component, replacement is usually necessary. This involves:
- Removing the failed component (evaporator coil, condenser coil, or line set)
- Installing a new replacement part
- Brazing all connections to create sealed joints
For Valve Leaks: Schrader valve leaks are often the easiest to repair—simply replacing the valve core with a new one typically solves the problem.
Step 4: System Evacuation
After completing the repair, your technician must evacuate all air and moisture from the refrigerant system using a vacuum pump. This critical step:
- Removes air that would reduce system efficiency
- Eliminates moisture that could freeze and cause blockages
- Prepares the system for the refrigerant recharge
Proper evacuation takes at least 30-45 minutes. Rushing this step can lead to system problems down the road.
Step 5: Leak Testing
Before recharging the system, your technician will verify the repair by pressurizing the system with nitrogen and monitoring for pressure loss. This confirms the leak is truly fixed before adding expensive refrigerant.
Step 6: Refrigerant Recharge
Once the leak test passes, your technician will recharge your system with the correct type and amount of refrigerant. This isn't guesswork—your system's manufacturer specifies the exact refrigerant charge, typically listed on the nameplate.
The technician will:
- Add refrigerant slowly while monitoring system pressures
- Check subcooling and superheat to ensure proper charge
- Verify the system is operating within manufacturer specifications
Step 7: Filter Drier Replacement
Most professional refrigerant leak repairs include replacing the filter drier. This component removes moisture and contaminants from the refrigerant. When the system has been open to the atmosphere during repairs, replacing the filter drier protects your compressor and ensures long-term system health.
Step 8: Final System Testing
Your technician will run the system through complete cooling cycles, checking:
- Temperature split (difference between return and supply air)
- System pressures under operating conditions
- Electrical amperage draw
- Overall cooling performance
This ensures everything is working correctly before they leave your home.
How Much Does Refrigerant Leak Repair Cost?
Refrigerant leak repair costs vary widely depending on the leak location and severity. Here's what you can typically expect:
Minor Leak Repairs
Simple repairs like replacing a Schrader valve core or fixing an accessible line connection typically cost $200-$500, including:
- Service call and diagnostic fee ($75-$150)
- Refrigerant recovery and recharge ($150-$300)
- Minor repair labor ($75-$150)
Moderate Repairs
Repairing or replacing accessible refrigerant lines costs $500-$1,200, including parts, labor, refrigerant, and testing.
Major Component Replacement
Replacing an evaporator coil, condenser coil, or complete line set is considerably more expensive:
- Evaporator coil replacement: $1,000-$2,500
- Condenser coil replacement: $800-$2,000
- Line set replacement: $600-$1,500
These prices include the component, labor for installation, refrigerant recovery and recharge, system evacuation, and testing.
Additional Cost Factors
Several factors can increase refrigerant leak repair costs:
- Refrigerant type: R-22 (Freon) is being phased out and costs significantly more than R-410A
- System age: Older systems may require additional repairs
- Accessibility: Hard-to-reach leaks take more time to repair
- Emergency service: After-hours or weekend calls typically cost 1.5-2x more
Refrigerant Leak Repair vs. System Replacement: Making the Right Choice
Not every refrigerant leak is worth repairing. Your HVAC technician should help you weigh repair against replacement based on several factors.
When Repair Makes Sense
Consider refrigerant leak repair when:
- Your system is less than 10 years old
- The leak is easily accessible and repairable
- Repair costs are less than 50% of replacement cost
- Your system has been well-maintained
- The rest of your system is in good condition
When Replacement Is Better
Consider replacing your entire system when:
- Your AC is 15+ years old
- You have a major component leak (evaporator or condenser coil)
- Repair costs exceed 50% of replacement cost
- Your system uses R-22 refrigerant (being phased out)
- You've had multiple repairs in recent years
- Your system is inefficient (below 13 SEER)
Many homeowners find that upgrading to a modern, efficient HVAC system saves them money in the long run through lower energy bills and improved reliability.
How Long Does Refrigerant Leak Repair Take?
The timeline for refrigerant leak repair depends on the complexity:
- Simple valve or connection repair: 2-4 hours
- Accessible line repair: 3-5 hours
- Evaporator coil replacement: 4-8 hours (or multiple days if parts need ordering)
- Condenser coil replacement: 3-6 hours
- Complete line set replacement: 6-10 hours
Keep in mind that if your technician needs to order parts, the complete repair might take several days from diagnosis to completion.
Can You Repair a Refrigerant Leak Yourself?
While some homeowners consider DIY refrigerant leak repair to save money, this isn't a recommended approach for several important reasons:
Legal Requirements
Working with refrigerant requires EPA Section 608 certification. It's illegal for unlicensed individuals to purchase, handle, or vent refrigerant. Violations can result in significant fines.
Safety Concerns
Refrigerant is a hazardous chemical that can cause:
- Frostbite from direct contact
- Asphyxiation in confined spaces
- Environmental damage if improperly released
Specialized Equipment Needed
Professional refrigerant leak repair requires expensive specialized tools:
- Refrigerant recovery machine ($500-$2,000)
- Vacuum pump ($150-$500)
- Manifold gauge set ($100-$300)
- Leak detectors ($100-$1,000)
- Brazing torch and materials ($100-$300)
- Nitrogen tank for testing ($100+)
Technical Expertise
Proper refrigerant system repair requires:
- Understanding refrigerant pressures and temperatures
- Ability to properly braze copper connections
- Knowledge of system evacuation procedures
- Skills to diagnose underlying issues
For these reasons, refrigerant leak repair should always be left to licensed, certified HVAC professionals.
Understanding Refrigerant Types and Their Impact on Repair
The type of refrigerant in your system significantly affects the repair process and cost.
R-22 (Freon) Systems
If your AC was installed before 2010, it likely uses R-22 refrigerant. Important facts:
- R-22 production ended in 2020 due to environmental concerns
- Remaining supplies are limited and expensive
- R-22 now costs 3-5x more than modern refrigerants
- Repairing R-22 leaks may not be cost-effective
Many homeowners with R-22 systems choose replacement over repair to avoid future high refrigerant costs.
R-410A (Puron) Systems
Modern systems use R-410A refrigerant, which offers:
- Better environmental profile
- More readily available and affordable
- Improved energy efficiency
- Better cooling performance
R-410A leak repairs are generally more cost-effective than R-22 repairs.
R-32 and Other Newer Refrigerants
Some very recent systems use R-32 or other next-generation refrigerants designed to further reduce environmental impact while improving efficiency.
What to Expect After Refrigerant Leak Repair
Once your refrigerant leak repair is complete, you should notice immediate improvements:
Immediate Results
- Your AC will blow cold air at the proper temperature
- The system will cycle on and off normally instead of running constantly
- Indoor humidity levels will decrease
- Energy bills should return to normal levels
Long-Term Performance
A properly repaired refrigerant leak should last for years. However, be aware that:
- Old systems may develop additional leaks over time
- Regular maintenance helps prevent future leaks
- Warranty on repairs typically covers 30 days to 1 year
Monitoring Your System
After refrigerant leak repair, watch for these signs that might indicate ongoing issues:
- Warm air from vents
- Ice forming on refrigerant lines
- Higher than normal energy bills
- System running constantly
If you notice these refrigerant leak symptoms, contact your HVAC technician right away.
Preventing Future Refrigerant Leaks
While not all refrigerant leaks are preventable, regular maintenance significantly reduces your risk:
Annual Professional Maintenance
Schedule yearly tune-ups that include:
- Inspecting all refrigerant connections
- Checking system pressures
- Cleaning coils to prevent corrosion
- Tightening electrical connections that cause vibration
Protect Your Outdoor Unit
- Keep landscaping 2-3 feet away from your condenser
- Avoid using weed whackers near refrigerant lines
- Don't store chemicals near your outdoor unit
- Consider a protective cage if you have kids or pets
Change Air Filters Regularly
Dirty filters force your system to work harder, increasing vibration and stress on refrigerant connections. Replace filters every 1-3 months depending on usage.
Address Small Issues Quickly
Strange noises, reduced cooling, or other minor issues can lead to refrigerant leaks if ignored. Early attention prevents major problems.
Common Questions About Refrigerant Leak Repair
How do I know if I have a refrigerant leak?
Common signs include warm air from vents, ice on refrigerant lines, hissing sounds near the AC, higher energy bills, and your system running constantly without reaching the set temperature.
Is a refrigerant leak an emergency?
While not immediately dangerous in most cases, refrigerant leaks should be addressed promptly. A leaking system will continue losing refrigerant, potentially damaging your compressor, which is expensive to replace.
Can leak sealant fix my refrigerant leak?
Refrigerant leak sealants are controversial. While some technicians use them for very small leaks, they can clog system components and void warranties. Most professionals recommend proper leak location and repair instead of sealants.
Will my warranty cover refrigerant leak repair?
Coverage depends on your specific warranty terms. Many manufacturers provide 5-10 year parts warranties that cover component failures, including leaking coils. Labor is usually not covered after the first year. Extended warranties may offer additional coverage.
How long will my repair last?
A properly performed refrigerant leak repair on a mid-life system should last for years. However, older systems may develop additional leaks as other components age and corrode.
Getting Your Refrigerant Leak Repaired
When you suspect a refrigerant leak, taking quick action prevents further damage and discomfort. Here's what to do:
- Turn off your AC to prevent compressor damage from low refrigerant
- Call a licensed HVAC technician with proper EPA certification
- Get a detailed diagnosis including leak location and repair vs. replacement recommendations
- Request a written estimate covering all costs before authorizing work
- Ask about warranties on both parts and labor
- Schedule regular maintenance after repair to prevent future issues
Professional refrigerant leak repair involves much more than simply "topping off" your system. The complete process—from leak detection through final testing—ensures your AC operates efficiently, safely, and reliably for years to come.
Understanding what a refrigerant leak repair usually involves helps you make informed decisions about your home comfort system and ensures you get quality service from your HVAC contractor.