
What a Technician Checks During Furnace Repair: Complete Inspection Guide
What a Technician Checks During Furnace Repair: Complete Inspection Guide
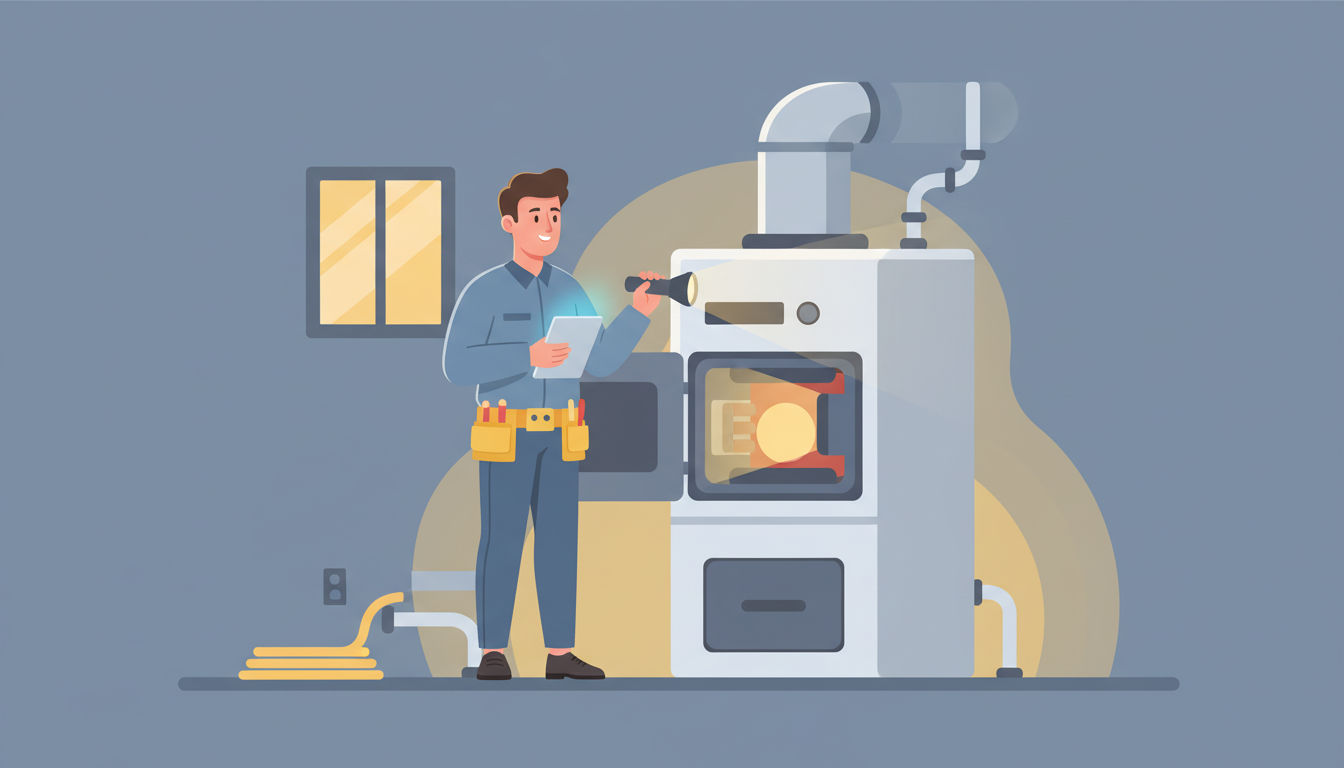
When your furnace stops working on the coldest day of winter, you need answers fast. Understanding what a technician checks during furnace repair helps you know what to expect and why professional service is worth the investment. This comprehensive guide walks you through every step of the inspection process, from initial diagnostics to the final safety check.
Why Professional Furnace Diagnostics Matter
Your furnace is a complex system with multiple components working together to keep your home warm. When something goes wrong, identifying the root cause requires specialized training and diagnostic equipment. A professional HVAC technician doesn't just swap parts—they systematically test each component to find exactly what's causing your heating problems.
Most furnace repairs take 1-3 hours depending on the issue. Simple fixes like replacing an igniter or flame sensor can be completed quickly, while complex problems involving the heat exchanger or blower motor may require additional time or even a follow-up visit.
The Initial Assessment: What Happens When Your Technician Arrives
Before touching any tools, experienced technicians gather crucial information. They'll ask about symptoms you've noticed: strange noises, weak airflow, short cycling, or complete system failure. These details help narrow down potential causes before the physical inspection begins.
Safety First: The Preliminary Scan
The first thing any qualified technician checks is safety. They'll verify that:
- All access panels are properly secured
- Electrical connections appear intact with no exposed wiring
- The gas shutoff valve (for gas furnaces) is in the correct position
- There are no visible signs of fire damage, water intrusion, or corrosion
- The area around your furnace is clear of flammable materials
This preliminary scan takes just minutes but prevents dangerous situations from escalating.
Reading Fault Codes: Your Furnace's Communication System
Modern furnaces have built-in diagnostic systems that flash error codes when problems occur. These codes appear as a series of LED blinks on the control board. Your technician will:
- Record all active fault codes
- Reference the manufacturer's code chart
- Use codes as a starting point, not the final answer
Here's an important detail most homeowners don't know: fault codes indicate symptoms, not always root causes. A pressure switch error might point to a faulty switch, but it could also mean a blocked vent, dirty filter, or failing inducer motor. Professional diagnostics go beyond the code to find the real problem.
Critical Component Checks During Furnace Repair
Heat Exchanger Inspection: The Safety Priority
The heat exchanger is your furnace's most critical safety component. It separates combustion gases from the air that circulates through your home. When heat exchangers crack or corrode, deadly carbon monoxide can leak into your living space.
During repair visits, technicians inspect the heat exchanger by:
- Visually examining accessible sections with a flashlight and inspection mirror
- Looking for soot buildup, rust, or visible cracks
- Running the furnace and watching for flame patterns that indicate breaches
- Testing for carbon monoxide in the supply air using specialized meters
If your heat exchanger is cracked, replacement is the only safe option. Most manufacturers warranty heat exchangers for 10-20 years, but labor typically isn't covered.
Thermostat Calibration and Communication
Your thermostat tells your furnace when to heat, but communication problems create frustrating issues. Technicians test:
- Whether the thermostat accurately reads room temperature
- If it's sending proper signals to the furnace control board
- Battery condition (for battery-powered models)
- Wire connections at both the thermostat and furnace end
A thermostat that's off by just 3-4 degrees can make your home uncomfortable even when the furnace is working perfectly. For more insights on maintaining your entire HVAC system, check out our comprehensive HVAC repair guide.
Ignition System: Getting the Fire Started
Gas furnaces use either an electronic igniter or a standing pilot light to create the flame that heats your home. This is one of the most common repair areas.
For electronic igniters, technicians:
- Measure resistance with a multimeter (should be 40-90 ohms for most models)
- Look for visible cracks or breaks in the igniter element
- Check the control board signal that activates the igniter
- Verify proper timing between ignition and gas valve opening
For pilot lights, they check:
- Whether the pilot stays lit consistently
- Flame color and size (should be blue with a small yellow tip)
- Thermocouple or flame sensor condition
- Gas pressure at the pilot assembly
Flame Sensor: The Often-Overlooked Culprit
If your furnace lights but shuts off after a few seconds, the flame sensor is the likely suspect. This small rod sits in the burner flame and confirms that gas is actually burning. When it gets coated with carbon buildup, it can't detect the flame properly.
Technicians will:
- Remove and inspect the sensor for carbon deposits
- Clean it gently with fine-grit sandpaper or emery cloth
- Check the microamp signal the sensor sends to the control board
- Verify proper positioning in the flame path
This simple cleaning often solves no-heat complaints and takes just minutes to complete.
Blower Motor and Assembly Check
Your blower motor moves heated air throughout your home. Even if the furnace creates heat, a malfunctioning blower means no warm air reaches your rooms.
During inspection, technicians:
- Listen for unusual bearing noises (squealing or grinding)
- Measure amp draw and compare it to the motor nameplate
- Check that the blower wheel spins freely without wobbling
- Inspect motor mounts and housing for cracks or loose bolts
- Verify capacitor condition (for single-phase motors)
High amp draw indicates the motor is working too hard, usually from a dirty blower wheel, restricted airflow, or failing bearings. Our furnace repair guide covers common blower issues in detail.
Pressure Switch Testing: Proving Safe Venting
The pressure switch is a safety device that confirms your furnace is venting combustion gases properly. It won't let the ignition sequence start unless the inducer motor creates adequate draft.
Technicians test pressure switches by:
- Measuring actual pressure with a manometer
- Comparing readings to manufacturer specifications
- Checking the rubber hose connections for cracks or blockages
- Verifying electrical continuity when the switch should be closed
- Inspecting the vent pipes for obstructions or improper slope
A failing pressure switch often indicates bigger venting problems rather than a bad switch. That's why experienced technicians investigate the cause, not just replace the part. For specific pressure switch issues, read our guide on common causes of pressure switch problems in furnaces.
Limit Switch and Temperature Controls
Limit switches prevent your furnace from overheating by shutting off the burners when temperatures exceed safe levels. They're critical safety devices but also common failure points.
Your technician will:
- Test limit switch operation with a heat gun or by running the furnace
- Verify the set point matches manufacturer specifications
- Check for proper airflow (blocked filters cause frequent limit trips)
- Measure temperature rise across the heat exchanger
- Inspect for signs of overheating or repeated tripping
Repeated limit switch failures usually mean insufficient airflow, undersized ductwork, or a dirty coil—not a defective switch.
Gas System Inspection for Gas Furnaces
Manifold Gas Pressure: The Foundation of Proper Combustion
Correct gas pressure ensures complete, efficient combustion. Too much pressure creates large, dangerous flames. Too little causes incomplete burning and carbon monoxide production.
Technicians measure:
- Incoming gas pressure to the furnace (typically 5-7 inches water column)
- Manifold pressure at the burners (usually 3.5 inches for natural gas)
- Pressure while the furnace runs under full load
They compare these readings to the furnace nameplate specifications and adjust the gas valve regulator if needed.
Combustion Analysis: Ensuring Efficiency and Safety
Professional combustion analysis uses electronic meters to measure:
- Oxygen levels in the flue gases (should be 5-9% for most furnaces)
- Carbon monoxide in parts per million (should be under 50 ppm air-free)
- Carbon dioxide percentage (indicates combustion completeness)
- Flue gas temperature
- Draft pressure
These readings tell the technician whether your furnace is burning cleanly and efficiently. High CO readings trigger immediate investigation and often require heat exchanger replacement.
Electrical System Verification
Power Supply and Voltage Testing
Your furnace needs proper voltage to operate safely. Technicians use a multimeter to check:
- 120V supply voltage at the furnace disconnect
- 24V transformer output for control circuits
- Voltage drop across connections under load
- Neutral and ground continuity
Low voltage causes erratic operation and can damage sensitive electronic controls. Loose connections create heat and fire hazards.
Control Board and Wiring Inspection
The control board is your furnace's brain, managing ignition sequences, safety checks, and blower operation. Technicians inspect:
- Circuit board for burnt components or visible damage
- All wire connections for tightness and corrosion
- Relay contacts for pitting or welding
- Indicator LEDs for fault codes
- Wire insulation for heat damage or rodent chewing
Modern furnaces have complex control systems, and technicians need specialized training to diagnose board-level failures properly.
Airflow and Filter Assessment
The Filter Check: Foundation of Furnace Health
Experienced technicians check your filter immediately because it shapes the entire visit. A severely clogged filter causes multiple problems that mimic component failures.
They'll assess:
- Filter MERV rating and whether it's appropriate for your system
- How dirty the filter is and when it was last changed
- Whether the filter fits properly without air bypass
- Static pressure drop across the filter
Most homeowners should change filters every 30-90 days depending on usage, pets, and local air quality.
Ductwork and Venting Inspection
Poor ductwork undermines even a perfectly functioning furnace. Technicians look for:
- Supply and return duct leakage at joints and seams
- Proper duct sizing for your furnace capacity
- Adequate return air pathways
- Vent pipe slope, support, and termination
- Flue blockages from nests, debris, or ice
Restricted airflow forces your furnace to work harder and triggers safety switches. Proper ductwork is essential for efficient heating.
The Final Testing Phase
Complete Heat Cycle Observation
After diagnosing and repairing the problem, technicians run your furnace through a complete heating cycle, watching carefully for:
- Proper ignition timing and sequence
- Steady, consistent flame pattern
- Blower startup at the correct delay
- Temperature rise within manufacturer specifications
- Smooth operation without unusual sounds
- Proper shutdown sequence
This cycle confirms the repair solved the problem and didn't create new issues.
Temperature Rise Verification
Temperature rise measures the difference between return air and supply air temperatures. It's a critical efficiency and safety metric.
Technicians measure:
- Return air temperature at the furnace
- Supply air temperature at the nearest register
- Calculate the difference (typically 40-70°F depending on furnace type)
Temperature rise outside specifications indicates airflow problems, incorrect furnace sizing, or improper gas pressure.
Carbon Monoxide Safety Testing
Before leaving, responsible technicians test for carbon monoxide:
- In the supply air registers
- Near the furnace cabinet
- In living spaces near the furnace room
- At the vent termination outside
Even trace amounts of CO in your home's air require immediate investigation. Modern CO meters detect levels as low as 1 part per million.
What Homeowners Should Prepare Before the Technician Arrives
You can help your repair visit go smoothly by:
- Clearing access to the furnace and removing stored items
- Noting when problems occur and any unusual sounds or smells
- Locating your furnace's make, model, and age information
- Having your maintenance records available
- Ensuring pets are secured away from the work area
This preparation helps technicians work efficiently and may reduce service time.
Common Repairs and Replacement Parts
Based on our experience, the most frequently replaced furnace components during repair visits include:
Igniters - Typically last 3-5 years and cost $150-300 installed Flame sensors - Often just need cleaning, replacement runs $100-250 Blower motors - Last 10-15 years, replacement costs $400-800 Pressure switches - Usually replaced when truly faulty for $150-350 Limit switches - Replaced for $150-300 but often indicate airflow issues Gas valves - Last 15+ years, expensive to replace at $300-600 Control boards - Replacement runs $200-600 depending on complexity
Labor charges typically add $75-150 per hour to parts costs. Complex repairs requiring extensive diagnostics may involve 2-4 hours of labor.
When Repair Isn't the Best Option
Sometimes replacement makes more financial sense than repair. Consider replacement when:
- Your furnace is over 15 years old and needs major repairs
- The heat exchanger is cracked (repair can cost $1,000-2,500)
- You're facing repeated repairs costing $500+ annually
- Energy bills are climbing despite regular maintenance
- Your furnace is significantly oversized or undersized for your home
A qualified technician should present both repair and replacement options with honest cost-benefit analysis.
FAQ About Furnace Repair Inspections
How long does a typical furnace repair visit take?
Most furnace repairs take 1-3 hours from arrival to completion. Simple component replacements like igniters or sensors may be done in under an hour, while complex diagnostics or multiple repairs can take 3-4 hours. If parts need to be ordered, the technician will secure your system and return when parts arrive.
What should I ask my technician during the visit?
Ask about the root cause of the failure, not just the broken part. Request to see the faulty component if possible. Ask whether this repair addresses underlying problems or just symptoms. Inquire about expected lifespan of the replacement part and whether other components show signs of wear that might fail soon.
Can I run my furnace while waiting for repair?
It depends on the symptoms. If you notice gas odors, see yellow or orange flames instead of blue, or experience headaches and nausea (carbon monoxide symptoms), shut down immediately and call emergency services. For minor issues like weak airflow or short cycling, you can usually continue operation until the technician arrives.
Will my warranty cover furnace repairs?
Most manufacturers provide 5-10 year warranties on major components like heat exchangers, with 1-5 year coverage on other parts. However, warranties typically exclude labor costs and don't cover damage from lack of maintenance. Always verify coverage before authorizing repairs.
Should I get a second opinion on expensive repairs?
For repairs exceeding $500 or recommendations to replace your entire furnace, getting a second opinion is reasonable. However, be aware that diagnostic fees apply to each visit. Emergency repairs during extreme weather may need immediate decisions for your safety and comfort.
Choosing the Right Technician for Furnace Repair
Not all HVAC technicians have equal training and experience. Look for:
- Proper licensing for your state and local jurisdiction
- NATE (North American Technician Excellence) certification
- Good online reviews mentioning diagnostic skills and honesty
- Clear upfront pricing with written estimates
- Willingness to explain findings and show you the problem
A skilled technician should educate you, not just fix your furnace. They'll explain what failed, why it happened, and how to prevent future issues.
Conclusion: The Value of Thorough Furnace Diagnostics
Understanding what a technician checks during furnace repair helps you appreciate the complexity of modern heating systems. Professional diagnostics go far beyond swapping suspicious parts—they involve systematic testing, safety verification, and root cause analysis.
When your furnace fails, you're not just paying for a new igniter or pressure switch. You're paying for the knowledge to identify the problem correctly the first time, the training to repair it safely, and the expertise to prevent future failures. That professional approach keeps your family warm and safe all winter long.
Ready to schedule professional furnace repair? Choose a qualified HVAC technician who follows these comprehensive inspection procedures. Your comfort and safety depend on it.