
How Airflow Problems Trigger Costly HVAC Mechanical Failures
How Airflow Problems Trigger Costly HVAC Mechanical Failures
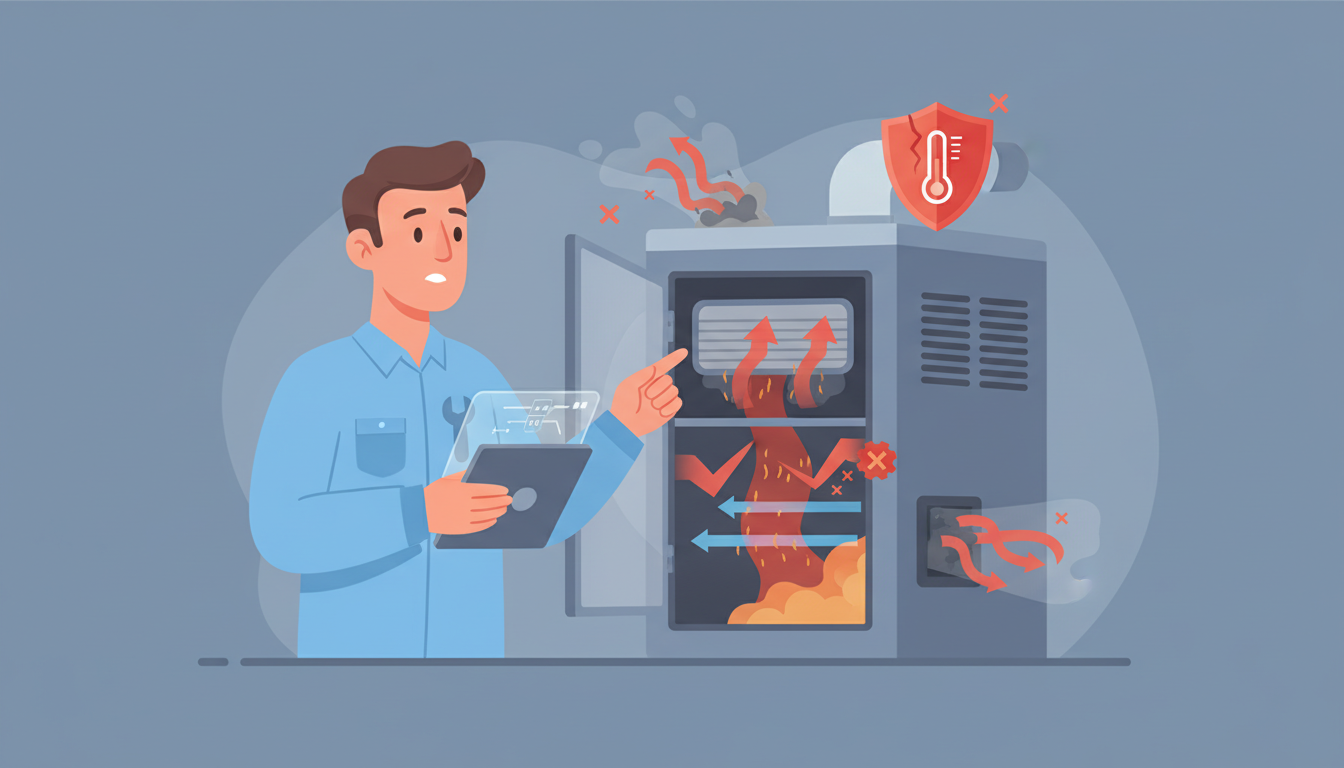
If your HVAC system is struggling with airflow issues, you're not just dealing with uncomfortable temperatures—you're watching a timer count down to expensive mechanical failures. Poor airflow doesn't just reduce comfort; it creates a cascade effect that systematically damages your system's most critical and costly components. Understanding why airflow problems cause HVAC failures can save you thousands in preventable repairs.
The Hidden Danger of Restricted Airflow
When your HVAC system can't move air properly, it's like asking your car's engine to run without oil. The system continues operating, but every cycle causes damage that compounds over time. Restricted airflow forces your equipment to work harder, run longer, and operate under conditions it was never designed to handle.
Most homeowners don't realize that the $30 problem of a dirty air filter today becomes the $3,000 compressor replacement tomorrow. The connection between these two events isn't obvious—until you understand the mechanics of how your HVAC system actually works.
Why Airflow Is the Foundation of HVAC Health
Your heating and cooling system depends on continuous air circulation to function properly. Air isn't just what cools or heats your home—it's the medium that transfers heat away from critical components, maintains proper refrigerant pressure, and keeps the entire system operating within safe temperature ranges.
When airflow becomes restricted, three critical problems occur simultaneously:
- Heat transfer efficiency drops dramatically - Your evaporator and condenser coils can't exchange heat effectively
- Component temperatures rise beyond safe limits - Motors, compressors, and electrical parts overheat
- System pressure becomes imbalanced - Refrigerant can't circulate properly, creating strain throughout the system
This combination creates what HVAC professionals call the "cascade effect"—one problem triggers the next in a domino pattern that accelerates system deterioration.
The Cascade Effect: From Airflow to System Failure
Understanding the cascade effect is key to recognizing why mechanical failures often follow airflow problems. Here's how this destructive pattern typically unfolds:
Stage 1: Initial Airflow Restriction
It starts with something simple—a clogged air filter, blocked vents, or dirty coils. Air volume through your system drops by 20-30%, but the thermostat still calls for cooling or heating. Your system tries to compensate by running longer cycles.
At this stage, you might notice:
- Uneven temperatures between rooms
- Longer run times to reach set temperature
- Slightly higher energy bills
- Reduced air coming from vents
Many homeowners ignore these early warning signs because the system still technically works. This is the critical mistake that leads to expensive failures.
Stage 2: Component Stress Begins
With reduced airflow, your evaporator coil can't absorb heat efficiently. The coil temperature drops too low, and condensation begins freezing on the coil surface. Meanwhile, because less heat is being removed from your home, your compressor must work harder and run longer to achieve the desired temperature.
The compressor—your system's most expensive component—now operates under increased load while receiving less cooling air from the compromised airflow. Internal temperatures rise, and the compressor motor begins experiencing thermal stress.
Your blower motor also strains against the increased resistance from dirty filters or blocked ducts. What should be easy air movement becomes a constant battle, causing the motor to draw more electricity and generate excess heat.
Stage 3: System Pressure Imbalance
Poor airflow disrupts the delicate refrigerant pressure balance your system needs. When the evaporator coil can't absorb heat properly, refrigerant pressure drops on the low-pressure side. When the condenser coil can't release heat efficiently, pressure rises on the high-pressure side.
This pressure imbalance forces your compressor to work against increasingly difficult conditions. The compressor must develop higher pressures to move refrigerant through the system, generating excessive heat and wearing internal components at an accelerated rate.
Stage 4: Mechanical Failure Occurs
Eventually, one component reaches its breaking point. Most commonly, it's the compressor that fails first—overheated, overworked, and operating far outside its design parameters. But you might also see:
- Blower motor burnout from sustained overheating
- Capacitor failure from excessive electrical load
- Contactor welding from sustained high-current draw
- Heat exchanger cracks in furnaces (from overheating)
- Complete system shutdown due to thermal protection
By this stage, you're facing repair bills ranging from $1,200 to $5,000 or more—all stemming from airflow problems that could have been resolved for under $200.
How Specific Airflow Problems Damage HVAC Components
Let's examine the most common airflow problems and the specific mechanical failures they trigger:
Dirty Air Filters: The $30 Problem That Destroys Compressors
A clogged air filter is the single most common cause of HVAC mechanical failure. When airflow drops due to filter restriction:
- Evaporator coils freeze - Reduced air means less heat absorption, causing ice buildup that further blocks airflow
- Compressor overheating - The compressor must run longer while receiving less cooling from circulating air
- Motor strain - The blower motor draws excess current trying to push air through the clogged filter
- Thermal load increases - Your system works 20-40% harder to achieve the same results
The fix costs $30 and takes 5 minutes. Ignoring it leads to compressor replacement at $3,000+.
Blocked or Leaky Ductwork: Silent System Killers
Ductwork problems are harder to spot but equally destructive. When ducts are blocked, crushed, or leaking:
- Pressure imbalances develop - Parts of your system receive too much or too little airflow
- Static pressure increases - Your blower motor works against excessive resistance
- Temperature extremes occur - Some areas get no air while others get too much
- System short cycling begins - Improper airflow causes rapid on-off cycles that wear components
Ductwork issues often require professional diagnosis, but addressing them prevents the motor burnout and compressor failures that follow.
Dirty Coils: The Hidden Efficiency Killers
When evaporator or condenser coils accumulate dirt, dust, or debris:
- Heat transfer drops by 30-50% - The coils can't do their job of heat exchange
- Refrigerant pressure swings wildly - The system can't maintain proper operating conditions
- Compressor overheating accelerates - Poor heat rejection means elevated operating temperatures
- Energy consumption spikes - Your system runs constantly without achieving desired results
Regular coil cleaning is inexpensive maintenance that prevents expensive mechanical repairs. Check out our complete HVAC repair guide for more maintenance tips.
Inadequate Return Air: The Suffocation Problem
Your HVAC system needs proper return air to function. When return air is restricted:
- System "suffocates" - Not enough air enters the system to be conditioned
- Negative pressure develops - This pulls unconditioned air through every crack and gap
- Air velocity drops - Reduced volume means poor distribution throughout your home
- Component strain increases - Your system works harder to move insufficient air
If you're experiencing weak airflow from vents, inadequate return air could be the underlying cause.
Blocked Vents and Registers: The Distribution Problem
Closing vents to "save energy" or blocking them with furniture creates serious problems:
- Static pressure increases - Your blower pushes against increased resistance
- System imbalance occurs - Other areas receive too much air to compensate
- Temperature stratification develops - Hot and cold spots become extreme
- Equipment cycling problems - The system can't satisfy the thermostat properly
This is especially problematic with second floor airflow problems, where blocked or closed vents create pressure imbalances throughout your home.
The Real Cost of Ignoring Airflow Problems
The financial impact of airflow-related mechanical failures extends beyond repair costs:
Repair Cost Comparison
- Airflow fix (filter, cleaning, minor repairs): $50-$200
- Blower motor replacement: $400-$800
- Capacitor replacement: $150-$400
- Compressor replacement: $1,500-$3,500
- Full system replacement: $5,000-$12,000
Every month you delay addressing airflow issues increases the likelihood you'll pay for the expensive repairs on the right side of this list.
Energy Cost Impact
Restricted airflow increases energy consumption by 20-40%. For the average home spending $150/month on heating and cooling, that's an extra $30-$60 monthly—or $360-$720 annually—just from airflow problems.
Over the typical 2-3 years before mechanical failure occurs, you've already spent $720-$2,160 in unnecessary energy costs, on top of the repair bill.
Lifespan Reduction
An HVAC system with good airflow should last 15-20 years. Systems operating with chronic airflow restriction typically fail in 8-12 years. You're literally cutting your system's lifespan in half through neglect.
Early Warning Signs That Airflow Is Stressing Your System
Catching airflow problems before they cause mechanical failure is crucial. Watch for these warning signs:
Temperature and Comfort Indicators
- Uneven temperatures between rooms (more than 3-5 degrees difference)
- Certain rooms never reach comfortable temperatures
- System runs constantly but doesn't satisfy thermostat
- Temperature swings are greater than normal
- Humidity levels are too high or too low
System Performance Indicators
- Longer run times to reach set temperature
- Frequent short cycling (starting and stopping every few minutes)
- System starts, runs briefly, then shuts off
- Reduced air velocity from supply vents
- Weak or inconsistent airflow throughout the home
Physical Signs of Problems
- Ice or frost on outdoor condenser unit
- Ice on indoor evaporator coil or refrigerant lines
- Excessive dust accumulation around vents
- Whistling or rushing air sounds from ductwork
- Visible dirt or debris on air filter after just 1-2 weeks
Cost and Efficiency Indicators
- Energy bills increasing without explanation
- System runs more hours per day than before
- Home takes longer to cool down or heat up
- Thermostat settings need adjustment to maintain comfort
- Air feels less "conditioned" (still humid when cooling, dry when heating)
If you notice three or more of these signs, you likely have airflow problems that are already stressing your system components.
Preventing the Cascade: Protecting Your HVAC Investment
The good news is that preventing airflow-related mechanical failures is straightforward and affordable. Follow this maintenance schedule:
Monthly Tasks (5 minutes)
- Check and change air filters - Every 30-60 days depending on use and household factors
- Inspect visible vents and registers - Ensure none are blocked by furniture or closed
- Listen for unusual sounds - New noises often indicate developing problems
Quarterly Tasks (15 minutes)
- Check outdoor condenser unit - Clear debris, vegetation, and obstructions within 2 feet
- Inspect condensate drain - Ensure it's flowing freely and not backing up
- Test system performance - Verify even temperatures and good airflow throughout home
Annual Professional Maintenance
Professional maintenance should include:
- Complete system inspection and cleaning
- Coil cleaning (both evaporator and condenser)
- Ductwork inspection and leak testing
- Airflow measurement and adjustment
- Refrigerant pressure verification
- Electrical connection tightening
- Motor and fan inspection
- System performance testing
Annual maintenance costs $100-$200 but prevents the $1,500-$5,000 failures that result from neglect.
Immediate Action Items
If you suspect airflow problems, take these steps immediately:
- Change your air filter right now - This single action solves 40% of airflow problems
- Clear all vents and registers - Remove furniture, curtains, and obstructions blocking airflow
- Inspect outdoor unit - Remove leaves, debris, and vegetation restricting condenser airflow
- Check for ice - If you see ice or frost anywhere on the system, turn it off and call a professional
When to Call a Professional
While basic airflow maintenance is DIY-friendly, some situations require professional expertise:
- Ice formation on coils or refrigerant lines
- Unusual noises (grinding, squealing, rattling)
- Burning smell from vents or equipment
- System frequently trips breakers
- Visible damage to ductwork or equipment
- Persistent problems after changing filters and clearing vents
- Uneven temperatures that don't improve with basic maintenance
Professional HVAC technicians have tools to measure actual airflow, test system pressures, and identify problems invisible to homeowners. Don't wait until mechanical failure occurs—early intervention prevents expensive repairs.
Understanding the Science: Why Restricted Airflow Destroys Components
For those interested in the technical details, here's what happens inside your system when airflow becomes restricted:
Heat Transfer Fundamentals
HVAC systems work by transferring heat from one location to another. This requires three elements:
- A temperature difference - Heat moves from warm to cool
- Contact surface area - More contact means more heat transfer
- Time for transfer - Adequate contact duration allows heat movement
Reduced airflow affects all three. When air moves slowly across coils, temperature differences become extreme (causing freezing or overheating), effective surface area decreases (as ice or dirt accumulates), and the system must run longer to transfer the same amount of heat.
Compressor Physics
Your compressor is designed to operate within specific temperature and pressure ranges. It expects:
- Refrigerant arriving at 60-65°F (cooling mode)
- Discharge temperatures around 150-170°F
- Specific pressure ratios between high and low sides
Poor airflow causes:
- Refrigerant arriving too cold (below 50°F)
- Discharge temperatures exceeding 200°F
- Pressure ratios doubling or tripling normal values
These extreme conditions cause internal compressor components to wear exponentially faster. What should be a 15-year lifespan becomes 5 years or less.
Motor Thermal Limits
Electric motors generate heat during operation. They're designed to dissipate this heat through:
- Airflow across the motor body
- Heat conduction to mounting surfaces
- Thermal capacity of internal components
When airflow drops, motor cooling becomes inadequate. Internal temperatures rise, and insulation begins to break down. At 10°C above design temperature, motor lifespan drops by 50%. At 20°C above design temperature, lifespan drops by 75%.
A blower motor struggling against a dirty filter can easily exceed these temperature thresholds, leading to premature failure.
FAQ: Common Questions About Airflow and HVAC Failures
How quickly can airflow problems cause mechanical failure?
The timeline varies based on severity, but typically:
- Mild restriction (dirty filter): 6-24 months before mechanical failure
- Moderate restriction (blocked ducts, dirty coils): 3-12 months
- Severe restriction (multiple issues): 1-6 months
- Critical restriction (frozen coil, blocked return): Days to weeks
The more restricted the airflow, the faster damage accumulates.
Can I prevent all mechanical failures by maintaining good airflow?
While airflow maintenance prevents 60-70% of HVAC mechanical failures, some failures occur from other causes: electrical problems, refrigerant leaks, manufacturing defects, or simple age. However, maintaining proper airflow dramatically reduces your risk of expensive repairs.
How do I know if my system already has damage from past airflow problems?
Signs of existing damage include:
- System requires frequent repairs
- Compressor runs hot (outdoor unit metal is too hot to touch)
- System short cycles or trips breakers
- Unusual noises during operation
- Declining efficiency despite maintenance
A professional inspection can assess whether components show wear from past airflow restriction.
Is it worth fixing airflow problems on an old system?
Absolutely. Even on a 12-15 year old system, fixing airflow problems extends lifespan and prevents expensive failures. You might get 2-5 additional years of service by addressing airflow issues—that's thousands in saved replacement costs.
What's the single most important thing I can do to prevent these problems?
Change your air filter regularly—every 30-60 days without exception. This single action prevents the majority of airflow-related mechanical failures and costs less than $10 per month.
Take Action Before It's Too Late
The relationship between airflow problems and HVAC mechanical failures isn't a mystery—it's predictable physics and thermodynamics. Restricted airflow creates conditions that systematically destroy your system's most expensive components through overheating, pressure imbalance, and excessive component stress.
The cascade effect means small problems become big failures. A $30 filter becomes a $3,000 compressor. A $150 coil cleaning becomes a $5,000 system replacement. The choice is yours: invest in simple maintenance today or pay for expensive failures tomorrow.
Start protecting your HVAC investment right now:
- Change your air filter immediately
- Clear all blocked vents and registers
- Schedule annual professional maintenance
- Monitor your system for early warning signs
- Address problems promptly when they appear
Your HVAC system is one of your home's most expensive investments. Understanding why mechanical failures often follow airflow problems empowers you to prevent those failures through simple, affordable maintenance. Don't wait for the cascade effect to destroy your system—take action today and save thousands in preventable repairs.