
Mini-Split Remote Not Working? What to Check
Mini-Split Remote Not Working? What to Check
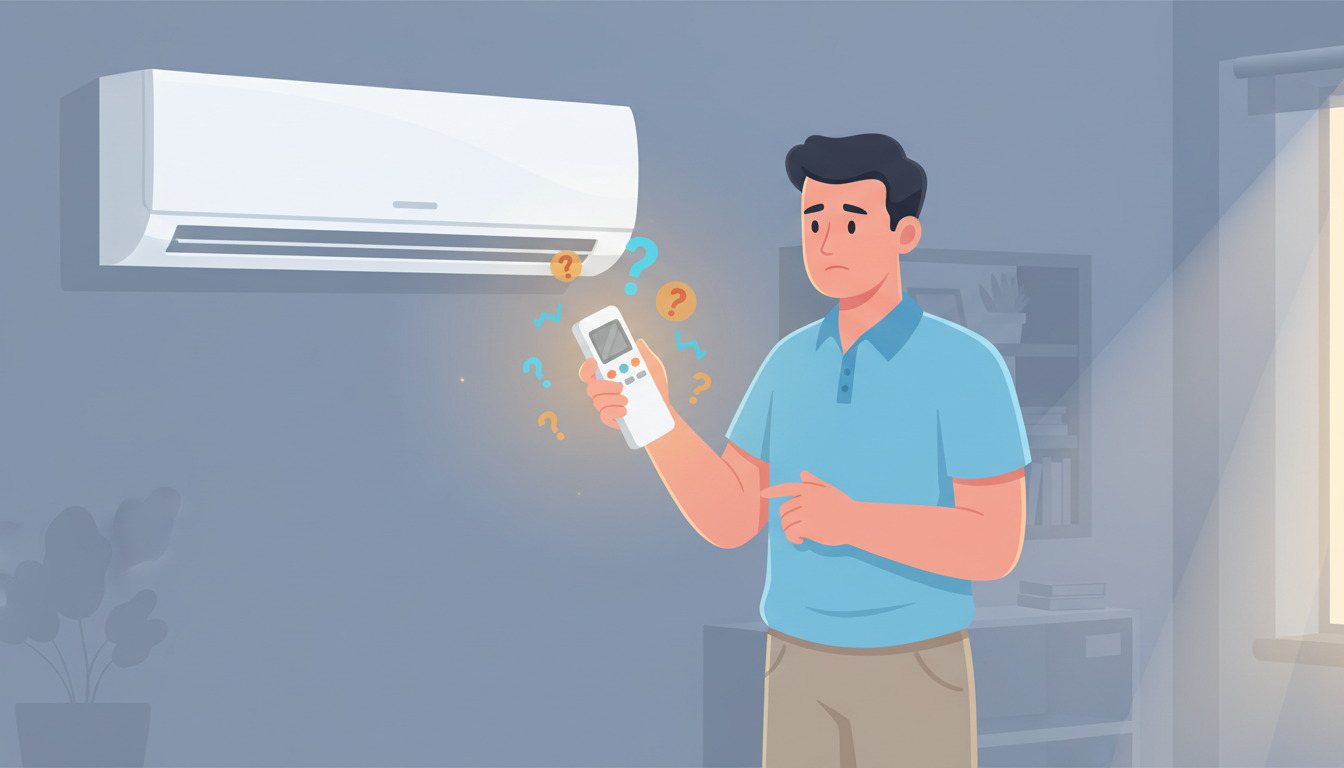
You reach for your mini-split remote to adjust the temperature, press the power button, and... nothing happens. Your system sits there, unresponsive, while your room gets uncomfortably warm or cold. Before you panic and call an HVAC technician, there's good news: most mini-split remote problems have simple fixes you can handle yourself in just a few minutes.
In this guide, we'll walk you through every troubleshooting step to get your mini-split remote working again, from the simplest battery swap to more advanced diagnostic techniques.
Start with This Quick Diagnostic Checklist
Before diving into detailed troubleshooting, run through this quick checklist. These five items solve about 80% of mini-split remote issues:
- Fresh batteries installed correctly with proper polarity
- Clear line of sight between remote and indoor unit sensor
- Within 15-20 feet of the indoor unit
- No bright light shining directly on the unit's sensor
- Remote buttons respond when pressed (not sticky or jammed)
If you've checked all five and your remote still doesn't work, keep reading for deeper troubleshooting steps.
Battery Issues: The #1 Culprit Behind Remote Problems
Dead or weak batteries cause more mini-split remote failures than any other issue. Even if your batteries seem "fine," they might not have enough power for the infrared signal to reach your unit.
Replace Your Batteries the Right Way
Don't just swap in any old batteries you find in a drawer. Here's the proper approach:
Use fresh batteries from a new package. Batteries sitting in storage lose charge over time, even if never used. That half-empty pack you've had for two years won't give you reliable performance.
Match the battery type to your remote. Most mini-split remotes use AAA batteries, but some models require AA. Check your remote's battery compartment for the correct size.
Install with correct polarity. It sounds obvious, but reversed batteries are a surprisingly common mistake. The positive (+) and negative (-) ends must match the diagram inside the battery compartment.
Avoid mixing old and new batteries. When replacing batteries, change both at the same time. Mixing old and new batteries causes uneven power drain and can leak.
Check for Battery Contact Corrosion
Even with good batteries, corroded contacts can prevent power from reaching your remote's circuitry. Open your battery compartment and look for:
- White, crusty buildup on the metal contacts
- Green or blue discoloration
- Rust or oxidation
If you spot corrosion, clean it gently with a cotton swab dipped in white vinegar or lemon juice. Let it dry completely before installing fresh batteries. For heavy corrosion, use fine sandpaper to remove the buildup, then wipe clean.
Signal and Range Problems: Why Your Remote Can't Communicate
Your mini-split remote uses an infrared (IR) signal to communicate with the indoor unit—the same technology as your TV remote. This signal requires a clear path and reasonable distance to work properly.
Clear the Line of Sight
Infrared signals can't pass through solid objects. Even something as simple as a book, plant, or piece of furniture blocking the path between your remote and the unit's sensor will prevent operation.
Locate your unit's IR receiver. It's usually a small, dark window on the front of the indoor unit, often near the display panel or power indicator light.
Remove all obstructions. Move anything sitting in front of the indoor unit. This includes curtains, wall art, furniture, or decorative items.
Test from different angles. If direct aim doesn't work, try pointing the remote slightly up, down, left, or right. Sometimes the sensor has a narrow reception angle.
Respect Distance Limitations
Infrared remotes have a maximum effective range, typically 15-20 feet for mini-split systems. Beyond this distance, the signal becomes too weak to register.
If you're trying to control your mini-split from across a large room or from another room entirely, you're likely out of range. Move closer to the unit and try again.
Combat Signal Interference
Certain light sources can interfere with infrared signals. The most common culprits:
Direct sunlight shining on the unit's sensor can overpower your remote's signal. We've seen cases where mini-splits only respond in the evening once the sun moves. If your remote works at certain times but not others, sunlight interference is likely the cause. Close blinds or curtains during problem hours.
LED lights and bulbs emit infrared wavelengths that can interfere with your remote. If you recently installed LED lighting near your mini-split, try turning off those lights and testing the remote again.
Reflective surfaces like mirrors or glass can bounce IR signals in unexpected directions. If your unit faces a mirror or large window, the reflected signals might confuse the receiver.
Other electronics placed near the indoor unit (like a TV, cable box, or another remote-controlled device) can create interference. Move these items away from your mini-split's sensor.
How to Reset Your Mini-Split Remote Control
When basic troubleshooting doesn't solve the problem, a reset often clears electronic glitches that prevent proper operation.
Standard Reset Procedure
This process works for most mini-split remote brands including Mitsubishi, Daikin, LG, and Fujitsu:
- Turn off your mini-split using the remote if it still has partial function, or use the manual control button on the unit
- Remove all batteries from the remote
- Press and hold the power button on the remote for 30 seconds (this drains residual charge)
- Wait another 30 seconds before proceeding
- Reinsert fresh batteries with correct polarity
- Point the remote directly at the unit from 3-5 feet away
- Press the power button and wait for the unit to respond
Advanced Reset: Re-Synchronize Your Remote
Some mini-split systems require the remote to be "paired" or synchronized with the indoor unit. If you've replaced your batteries or if the remote has been separated from the unit for an extended period, synchronization might be lost.
Check your owner's manual for model-specific sync instructions. The general process usually involves:
- Turning off the power to the unit at the breaker
- Waiting 5 minutes
- Turning power back on
- Pressing a specific button combination on the remote (varies by brand)
For Mitsubishi systems, the sync process often requires holding the temperature up and down buttons simultaneously for 5 seconds. For Daikin units, you might need to press the "Timer" and "Mode" buttons together.
Test Your Remote with the Phone Camera Trick
Not sure if your remote is sending a signal at all? Your smartphone has a built-in infrared detector that makes this easy to check.
Here's how to test:
- Open your phone's camera app (front or back camera works)
- Point your mini-split remote at the camera lens
- Press any button on the remote while watching your phone screen
- Look for a flashing light at the remote's IR transmitter (the bulb at the front of the remote)
If you see a purple, white, or pink flash on your phone screen when you press buttons, your remote is transmitting an IR signal. The problem lies with the indoor unit's receiver, not the remote itself.
If you see NO flash, your remote isn't working. This usually means dead batteries, corroded contacts, or a broken remote that needs replacement.
Note: Some newer smartphones have IR filters that block this test. If you don't see anything, try a different phone or an older camera.
Advanced Troubleshooting for Persistent Issues
If you've tried batteries, line-of-sight checks, and reset procedures without success, these advanced steps can help identify the problem.
Remote Display Not Showing or Faded
Many mini-split remotes have LCD displays showing temperature, mode, and settings. If your display is blank, dim, or faded:
Check battery strength. Weak batteries often cause dim displays before the remote stops working entirely. Replace with fresh batteries.
Look for liquid damage. If the remote was dropped in water or exposed to high humidity, moisture inside can damage the display. Remove batteries and let the remote dry in a warm, dry place for 24-48 hours.
Temperature extremes affect LCDs. If your remote was left in a very cold or hot location (like a car), the liquid crystal display might malfunction temporarily. Let it return to room temperature and try again.
Buttons Not Responding or Working Intermittently
Sticky or unresponsive buttons frustrate every mini-split owner eventually.
Clean around the buttons. Dirt, dust, and oils from your fingers build up around button edges over time. Use a cotton swab lightly dampened with rubbing alcohol to clean around each button. Don't oversaturate—you don't want liquid seeping inside.
Check for stuck buttons. Press each button individually and feel for resistance. A stuck button might keep your remote in an error state.
Test different buttons. If only certain buttons don't work (like temperature up/down but power works fine), you might have a worn-out remote that needs replacement.
Temperature Settings Keep Resetting or Jumping
If your temperature settings change on their own or jump to extreme values:
Replace the batteries immediately. This is a classic sign of very weak batteries causing erratic behavior.
Check for button damage. A physically damaged button might register multiple presses when you press it once.
Look for remote memory issues. Some remotes store your last settings in memory. If this memory is corrupted, a full reset (remove batteries, hold power for 30 seconds) might fix it.
Operating Your Mini-Split Without a Remote (Temporary Solution)
While you troubleshoot or wait for a replacement remote, you can still control your mini-split using the manual control panel.
Locate the manual controls. On most indoor units, you'll find a small panel with one or two buttons. Common locations include:
- Behind or inside the front cover (lift the cover to access)
- On the right side of the unit
- Hidden under a small flap near the display
Using manual controls: The manual button typically cycles through modes with each press:
- First press: Turn ON (usually Auto mode)
- Second press: Cool mode
- Third press: Heat mode (if applicable)
- Fourth press: Fan mode
- Fifth press: Turn OFF
You can't adjust specific temperatures or fan speeds with manual controls—these are emergency operation features only—but they'll keep you comfortable while you solve the remote issue.
When to Replace vs. Repair Your Remote
After troubleshooting, you might face the decision: fix the remote or replace it?
Replace Your Remote If:
Physical damage is visible. Cracked cases, broken battery covers, or missing buttons mean it's time for a new remote. Repairs aren't cost-effective.
Water damage occurred. If your remote took a swim in a sink, pool, or toilet, replacement is your best bet. Even if it works after drying, corrosion will eventually cause failure.
The remote is very old. Remotes lasting 10+ years have done well. At that age, internal components degrade and replacement makes more sense than troubleshooting.
Multiple functions failed. If several buttons don't work, the display is dead, AND reset procedures failed, the remote has multiple component failures.
Replacement Options
OEM (Original Equipment Manufacturer) remotes are brand-specific replacements that match your original exactly. These cost $30-$80 but guarantee compatibility. Order from your HVAC dealer or the manufacturer's website.
Universal mini-split remotes work with multiple brands and cost $15-$40. These are programmed to work with common mini-split protocols. Check compatibility with your specific brand and model before buying.
For help finding the right mini-split replacement parts and components, check out our mini-split repair guide.
When to Call a Professional HVAC Technician
Sometimes remote issues indicate larger problems with your mini-split system that require professional diagnosis.
Call a technician if:
- Your remote tests good (phone camera shows IR signal) but the unit never responds
- Error codes appear on the indoor unit display
- The manual control buttons on the unit also don't work
- You hear unusual noises or see warning lights on the unit
- Multiple troubleshooting attempts over several days show no improvement
These symptoms suggest the indoor unit's receiver, control board, or other internal components have failed. This type of HVAC repair requires specialized tools and training.
A certified technician can:
- Test the indoor unit's IR receiver with diagnostic equipment
- Check control board connections and power supply
- Identify refrigerant issues that might cause system unresponsiveness
- Replace faulty receivers or circuit boards
- Diagnose communication issues between indoor and outdoor units
Don't waste money on multiple remote replacements if the problem is actually inside your mini-split unit. A professional diagnostic visit can save you time and frustration.
Prevent Future Remote Control Problems
Once you've got your remote working again, these maintenance habits will help prevent future issues:
Store your remote properly. Use the wall-mounted holder if your system came with one. This keeps the remote in an ideal position for signal transmission and prevents drops or damage.
Replace batteries annually. Don't wait for batteries to die completely. Mark your calendar to replace remote batteries every 12 months, even if they still work.
Keep the remote clean. Wipe down your remote monthly with a dry cloth. Clean button areas quarterly with a lightly dampened cotton swab.
Avoid extreme temperatures. Don't leave your remote in direct sunlight, near heat vents, or in very cold areas. Temperature extremes shorten battery life and can damage LCD displays.
Clean the indoor unit's IR sensor. Every few months, gently wipe the sensor window on your indoor unit with a soft, dry cloth. Dust accumulation blocks the signal.
For comprehensive system maintenance that includes remote care, see our guide on multi-zone mini-split balancing and optimization.
Frequently Asked Questions
Why does my mini-split remote work sometimes but not others?
Intermittent remote function usually indicates one of three issues: weak batteries that work at close range but fail from distance, signal interference from sunlight or LED lights that varies by time of day, or a failing remote with intermittent internal connections. Start by replacing batteries, then observe whether the problem occurs at specific times (suggesting interference) or randomly (suggesting remote failure).
Can I use a universal remote with my mini-split?
Yes, many universal remotes are designed to work with multiple mini-split brands. However, compatibility varies by model, and some advanced features might not work with universal remotes. Check that the universal remote specifically lists your mini-split brand and model number before purchasing. OEM remotes offer guaranteed compatibility but cost more.
How do I know if my problem is the remote or the indoor unit?
Use the phone camera test described above to check if your remote transmits an infrared signal. If you see a flashing light on your phone screen when pressing buttons, your remote works fine—the problem is with the indoor unit's receiver or control board. If you see no flash, the remote is faulty. You can also test the indoor unit's manual control buttons; if those don't work either, the unit itself has a problem.
What's the lifespan of a mini-split remote control?
With normal use and proper care, a mini-split remote should last 5-10 years or longer. Remotes fail prematurely due to physical damage (drops, water exposure), battery corrosion from leaving dead batteries installed, or internal component degradation in very dusty or humid environments. Regular battery replacement and gentle handling maximize remote lifespan.
Will low refrigerant cause remote control issues?
No, refrigerant levels don't affect your remote's ability to communicate with the indoor unit. However, low refrigerant can cause the system to shut down or enter error mode, which might make it seem like the remote isn't working. If your remote transmits a signal (verified with the phone camera test) but the unit doesn't respond and shows error codes, refrigerant issues or other mechanical problems might be the cause—call a professional for diagnosis.
Get Your Comfort Back on Track
A non-working mini-split remote doesn't have to mean hours of frustration or an expensive service call. In most cases, fresh batteries, clear line of sight, or a simple reset will restore full function in just a few minutes.
Work through the troubleshooting steps in order, starting with the simplest solutions. The phone camera test helps you determine quickly whether you need a new remote or if the problem lies with your indoor unit. And remember, manual controls on the unit itself can keep you comfortable while you solve the issue.
If multiple troubleshooting attempts don't resolve your problem, or if you see error codes and warning lights, it's time to call a qualified HVAC technician. Some issues require professional diagnostic tools and expertise that go beyond remote troubleshooting.
Keep your mini-split system running smoothly with regular maintenance, annual battery replacement, and proper remote care. Your comfort depends on it—and now you know exactly what to check when your remote stops working.