
How Technicians Find HVAC Refrigerant Leaks: Expert Methods Revealed
How Technicians Find HVAC Refrigerant Leaks: Expert Methods Revealed
When your air conditioner isn't cooling properly, there's a good chance you have a refrigerant leak. But finding these leaks isn't guesswork—HVAC technicians use proven methods and specialized tools to pinpoint exactly where your system is losing refrigerant. Understanding how technicians find HVAC refrigerant leaks can help you appreciate the skill involved and know what to expect during a service call.
Let's walk through the professional leak detection process from start to finish.
Why Finding Refrigerant Leaks Matters
Refrigerant is the lifeblood of your HVAC system. When it leaks, your air conditioner can't transfer heat effectively, leading to poor cooling performance and higher energy bills.
Beyond comfort issues, refrigerant leaks have serious implications. Most refrigerants are greenhouse gases that harm the environment when released into the atmosphere. The EPA regulates how technicians handle refrigerants, requiring proper recovery and disposal.
Simply adding more refrigerant without fixing the leak is a temporary band-aid. Your system will lose refrigerant again, costing you money and potentially damaging your compressor. That's why professional refrigerant leak detection is essential for a lasting repair.
Step 1: Verification and Initial Assessment
Before breaking out leak detection equipment, experienced technicians verify that a leak actually exists. Not every cooling problem is caused by low refrigerant.
Checking System Pressures
Technicians connect manifold gauges to your system's service ports to measure refrigerant pressure. Low pressure readings on both the high and low sides typically indicate a refrigerant leak.
Analyzing Superheat and Subcooling
These measurements tell technicians exactly how much refrigerant is in your system. When superheat is too high or subcooling is too low, it confirms refrigerant loss. This data-driven approach ensures technicians don't waste time searching for leaks that don't exist.
Step 2: Visual Inspection for Tell-Tale Signs
Once a leak is confirmed, the search begins with your technician's eyes. Many refrigerant leaks leave visible clues that point to problem areas.
Oil Residue Detection
Refrigerant circulates through your system mixed with compressor oil. When refrigerant escapes, it often leaves behind oily residue at the leak point. Technicians look for oil stains on:
- Evaporator coil connections
- Condenser coil joints
- Refrigerant line fittings
- Service port valves
- Compressor fittings
Dark, greasy spots are red flags that warrant closer inspection with leak detection tools.
Ice Formation Patterns
Unusual ice or frost on refrigerant lines can indicate a leak location. When refrigerant escapes, it causes rapid cooling at that spot, creating visible frost buildup even in warm conditions.
Corrosion and Physical Damage
Technicians examine coils and lines for corrosion, dents, or punctures. Outdoor condenser coils are particularly vulnerable to damage from weed whackers, hail, or corrosive elements.
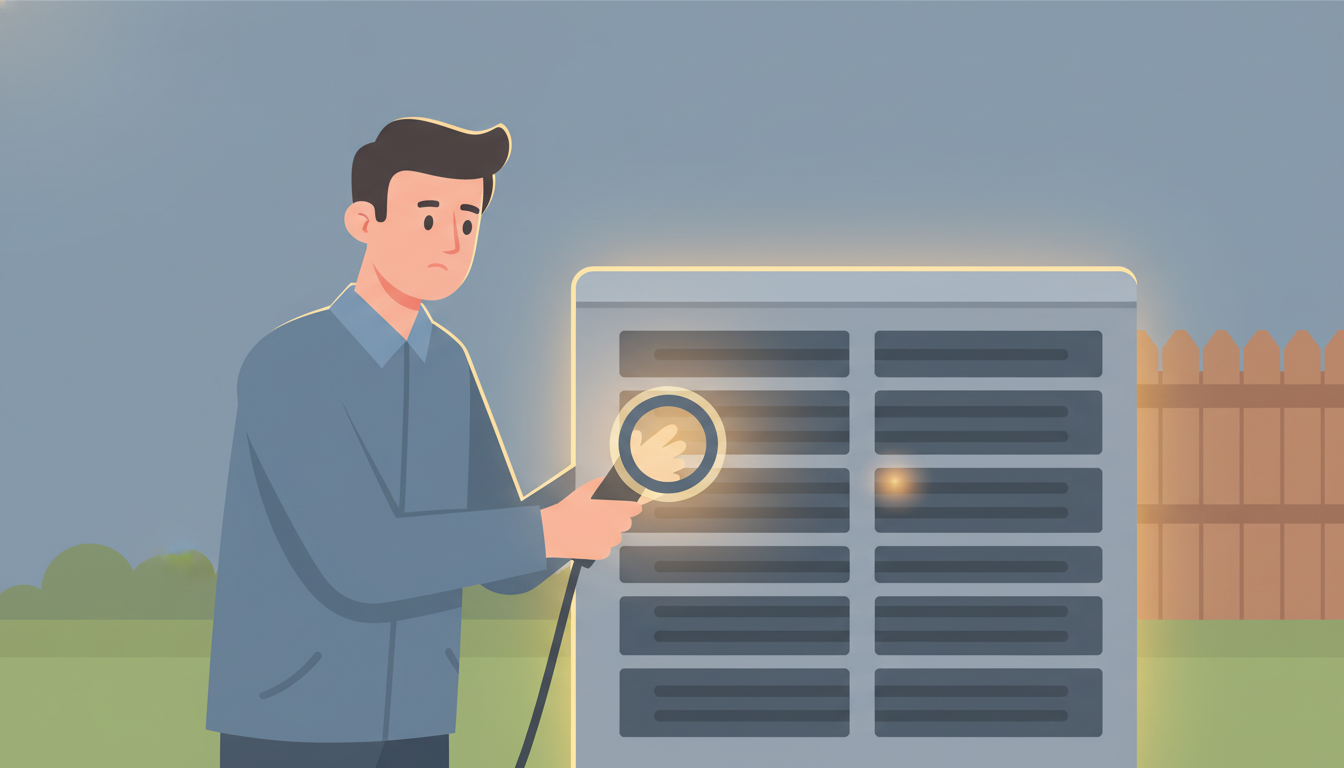
Step 3: Electronic Leak Detection
Electronic leak detectors are the workhorse tools for how technicians find HVAC refrigerant leaks. These sensitive devices can detect refrigerant concentrations as low as 0.1 ounces per year.
How Electronic Detectors Work
Modern electronic leak detectors use sensors that respond to refrigerant molecules in the air. The detector's probe tip is moved slowly around suspected leak areas. When refrigerant is detected, the device alerts the technician with:
- Increasingly rapid beeping
- Visual LED indicators
- Digital readings showing leak severity
Quality detectors can identify multiple refrigerant types including R-410A, R-22, R-32, and newer alternatives.
Proper Detection Technique
Professional technicians don't just wave the detector randomly. They follow a systematic approach:
- Start at the lowest point of the system (refrigerant is heavier than air)
- Move the probe slowly (about 1 inch per second)
- Check all fittings, joints, and connections
- Pay special attention to areas showing oil residue
- Verify any alerts with a secondary detection method
Electronic detectors are extremely sensitive, which is both a strength and a limitation. They can give false positives from residual refrigerant in the air, which is why technicians verify findings with other methods.
Step 4: Soap Bubble Testing for Verification
The soap bubble test is one of the oldest refrigerant leak detection methods, and it's still used today because it works. When electronic detectors indicate a potential leak, technicians verify it with leak detection solution.
How the Bubble Test Works
Technicians spray or brush a soapy solution onto suspected leak points. If refrigerant is escaping, it pushes through the solution and creates bubbles—confirming the exact leak location.
Professional leak detection solutions are specially formulated to:
- Create fine, long-lasting bubbles
- Work in various temperatures
- Not damage refrigerant system components
- Provide clear visual confirmation
This method is especially useful for checking service port Schrader cores, which are common leak points that electronic detectors might miss.
Step 5: Nitrogen Pressure Testing
When a system is completely empty of refrigerant, electronic detectors can't find leaks because there's nothing to detect. That's when technicians turn to nitrogen pressure testing.
The Nitrogen Testing Process
Technicians pressurize your empty HVAC system with dry nitrogen gas (not refrigerant). The system is pressurized to around 150-250 PSI, depending on system specifications.
After pressurization, technicians:
- Apply leak detection solution to all joints and connections
- Watch for bubbles indicating nitrogen escaping
- Monitor system pressure over time with gauges
- Check for pressure drops that confirm a leak exists
Nitrogen testing is particularly valuable for finding leaks in newly installed systems or after major repairs. It's also safer and less expensive than pressurizing with refrigerant.
Standing Pressure Tests
For slow or intermittent leaks, technicians may leave nitrogen in your system for several hours or overnight. A pressure drop during this time confirms a leak, even if its exact location remains elusive.
Step 6: UV Dye Leak Detection
When conventional refrigerant leak detection methods come up empty, UV fluorescent dye is the secret weapon for finding elusive leaks.
How UV Dye Detection Works
Technicians inject a special fluorescent dye into your refrigerant system. The dye circulates with the refrigerant and oil mixture. At leak points, the dye escapes along with the refrigerant.
After the system runs for 15-30 minutes (or longer for very slow leaks), technicians use a UV flashlight to inspect the system. The fluorescent dye glows brightly under UV light, pinpointing even the smallest leaks that other methods miss.
When Technicians Use UV Dye
UV dye is particularly useful for:
- Micro-leaks that lose less than 1 ounce per year
- Leaks in hard-to-access areas
- Intermittent leaks that come and go
- Finding multiple leak points in one inspection
One limitation: UV dye requires the system to have some refrigerant to circulate the dye. It won't work on completely empty systems.
The dye remains in your system indefinitely, making it easy to check for new leaks during future HVAC repair visits.
Step 7: Ultrasonic Leak Detection
High-end HVAC service companies use ultrasonic leak detectors for challenging leak scenarios. These devices detect the high-frequency sound that escaping refrigerant makes—even though it's inaudible to human ears.
Advantages of Ultrasonic Detection
Ultrasonic detectors excel at finding leaks in noisy environments where electronic detectors struggle. They're not confused by residual refrigerant in the air and can detect leaks whether the system is charged or pressurized with nitrogen.
These tools are especially valuable for large commercial systems with extensive refrigerant lines.
Common Leak Locations Technicians Check First
Experienced technicians know that certain components leak more frequently than others. They prioritize these high-probability areas:
Schrader Valve Cores
The service ports where technicians connect gauges have rubber seals that deteriorate over time. A loose or worn Schrader core is one of the easiest leaks to fix—and one of the most commonly overlooked.
Evaporator Coil
Indoor evaporator coils develop leaks from corrosion, vibration, or manufacturing defects. These leaks are particularly frustrating because the coil is often hidden inside your air handler, requiring disassembly to access.
If you've noticed refrigerant leak symptoms like reduced cooling or ice on your indoor unit, the evaporator coil is a prime suspect.
Condenser Coil
Outdoor condenser coils face harsh conditions—weather, debris, and potential physical damage. Corrosion from salt air (in coastal areas) or road salt is a common culprit.
Refrigerant Line Connections
Every brazed joint, flare fitting, and mechanical connection is a potential leak point. Vibration, temperature cycling, and improper installation can cause these connections to fail.
Compressor Fittings
The compressor has multiple refrigerant connections that can develop leaks, particularly if the compressor vibrates excessively due to worn mounting hardware.
How Long Does Leak Detection Take?
The time required for how technicians find HVAC refrigerant leaks varies based on several factors:
- Simple leaks: 15-30 minutes for obvious leaks at accessible fittings
- Standard inspection: 30-60 minutes for a thorough check with electronic detection
- Difficult leaks: 1-3 hours for elusive leaks requiring UV dye or extensive testing
- Multiple visits: Very slow leaks may require UV dye injection and a follow-up visit after the system runs for several days
Technicians who rush the process might miss leaks or provide inaccurate diagnoses. Thorough leak detection takes time and expertise.
What Happens After Finding the Leak
Once your technician locates the refrigerant leak, they'll explain the repair options and costs. The next steps typically include:
- Leak repair: Brazing new connections, replacing faulty components, or sealing small leaks
- System evacuation: Removing air and moisture with a vacuum pump
- Leak verification: Re-testing to confirm the repair was successful
- Refrigerant recharge: Adding the proper amount of refrigerant per manufacturer specifications
- Performance testing: Verifying your system cools properly
Some technicians may offer leak sealant products, but these are generally temporary solutions. Proper repairs involve fixing or replacing the leaking component.
Not sure if your system is leaking refrigerant or something else? Learn how to tell whether your HVAC is leaking water or refrigerant to better understand what you're dealing with.
Cost of Professional Refrigerant Leak Detection
Refrigerant leak detection costs vary by region and complexity:
- Basic leak detection: $150-$300 for standard electronic detection
- UV dye service: Additional $100-$200 for dye injection and inspection
- Extensive troubleshooting: $300-$600 for difficult-to-find leaks requiring multiple methods
Some HVAC companies include leak detection in their diagnostic fee, while others charge separately. Always ask for clear pricing before authorizing work.
Remember that leak detection is separate from the repair cost. Fixing the leak, evacuating the system, and recharging refrigerant will add to the total bill.
Why You Should Never Skip Professional Leak Detection
DIY leak detection methods you'll find online—like "freezing water bottles" or "listening for hissing"—rarely locate leaks accurately. Professional refrigerant leak detection requires:
- Specialized equipment costing thousands of dollars
- EPA certification for handling refrigerants
- Training to interpret readings and avoid false positives
- Knowledge of common failure points in different system types
Attempting to add refrigerant without finding and fixing the leak wastes money and harms the environment. It can also damage your compressor if the leak is severe.
Frequently Asked Questions
Can I find a refrigerant leak myself?
While you might spot obvious signs like oil residue or ice formation, accurately locating refrigerant leaks requires professional equipment and expertise. Electronic leak detectors, UV dye systems, and nitrogen testing equipment aren't practical for homeowners to purchase for a single use.
How often should I have my HVAC system checked for leaks?
If your system is cooling properly and maintaining refrigerant pressure, routine leak checks aren't necessary. However, annual maintenance inspections should include a refrigerant level check. If levels are dropping, that's when thorough leak detection becomes important.
Are refrigerant leak sealants effective?
Leak sealant products have mixed results. They may temporarily stop very small leaks, but they can also clog metering devices and contaminate the entire refrigerant system. Most professional technicians avoid sealants and recommend proper repairs instead.
What's the smallest leak a technician can find?
Modern electronic leak detectors can identify leaks as small as 0.1 ounces per year. UV dye systems can find even smaller leaks that would take years to significantly impact system performance. The detection method used depends on leak severity and location.
Can all refrigerant leaks be repaired?
Most refrigerant leaks can be repaired through brazing, component replacement, or tightening connections. However, extensive coil corrosion or compressor leaks may require replacing the entire component. Your technician will recommend the most cost-effective solution based on your system's age and condition.
Trust the Experts for Accurate Leak Detection
Understanding how technicians find HVAC refrigerant leaks reveals the complexity behind what seems like a simple task. From electronic detectors and UV dye to nitrogen testing and ultrasonic sensors, professionals have an arsenal of tools to locate even the most elusive leaks.
When your air conditioner isn't cooling properly, don't waste money on repeated refrigerant charges without addressing the underlying leak. Professional leak detection ensures accurate diagnosis, proper repairs, and long-term system reliability.
The investment in thorough leak detection pays for itself by preventing repeated service calls, protecting your compressor from damage, and keeping your system running efficiently for years to come. Choose an experienced HVAC technician who uses multiple detection methods to guarantee they find—and fix—your refrigerant leak the first time.